Register
← Back to the blog
New · Room staging betaProfessional & above · 30-day Professional pass

Multi-angle staging.
The same room, from every view.

The same furniture across multiple photos of a room? Upload your views, accept a look you like, and carry that design into the other angles.

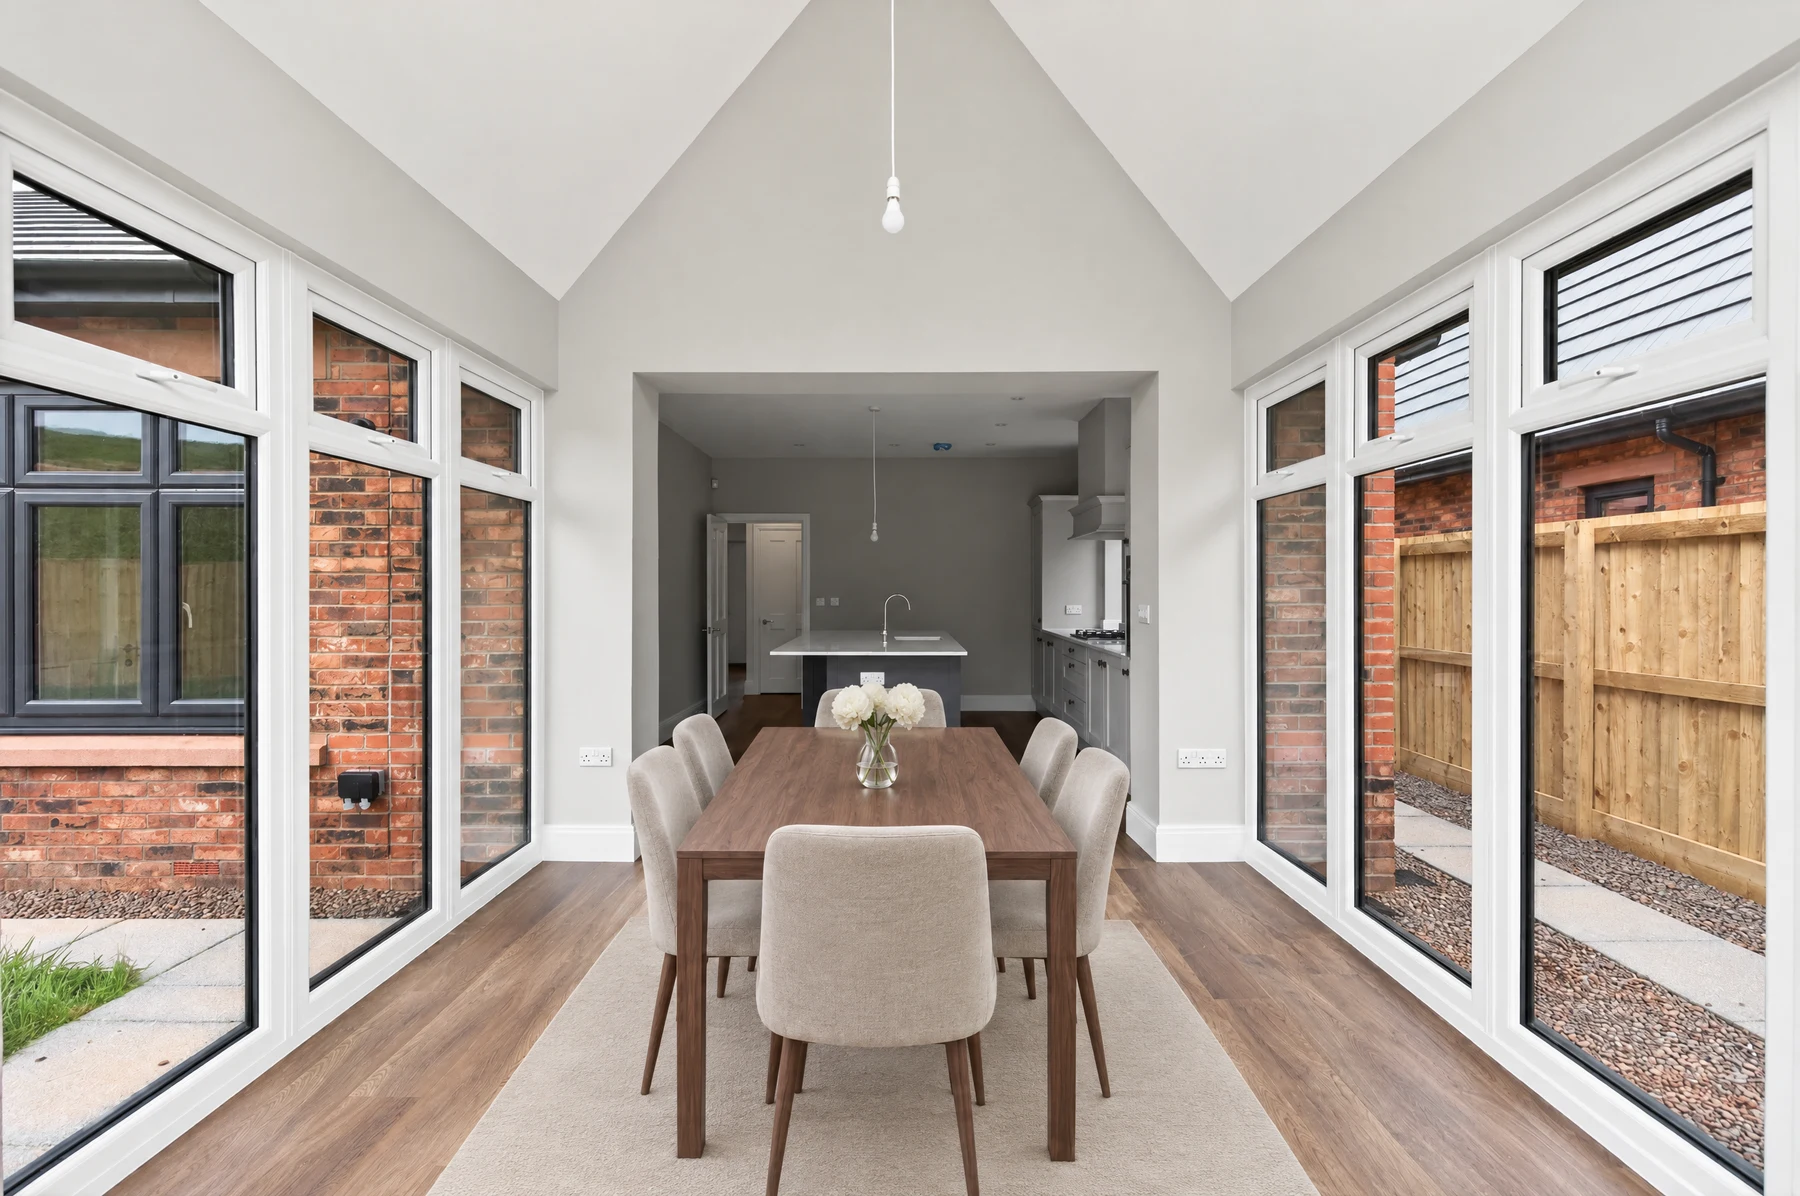
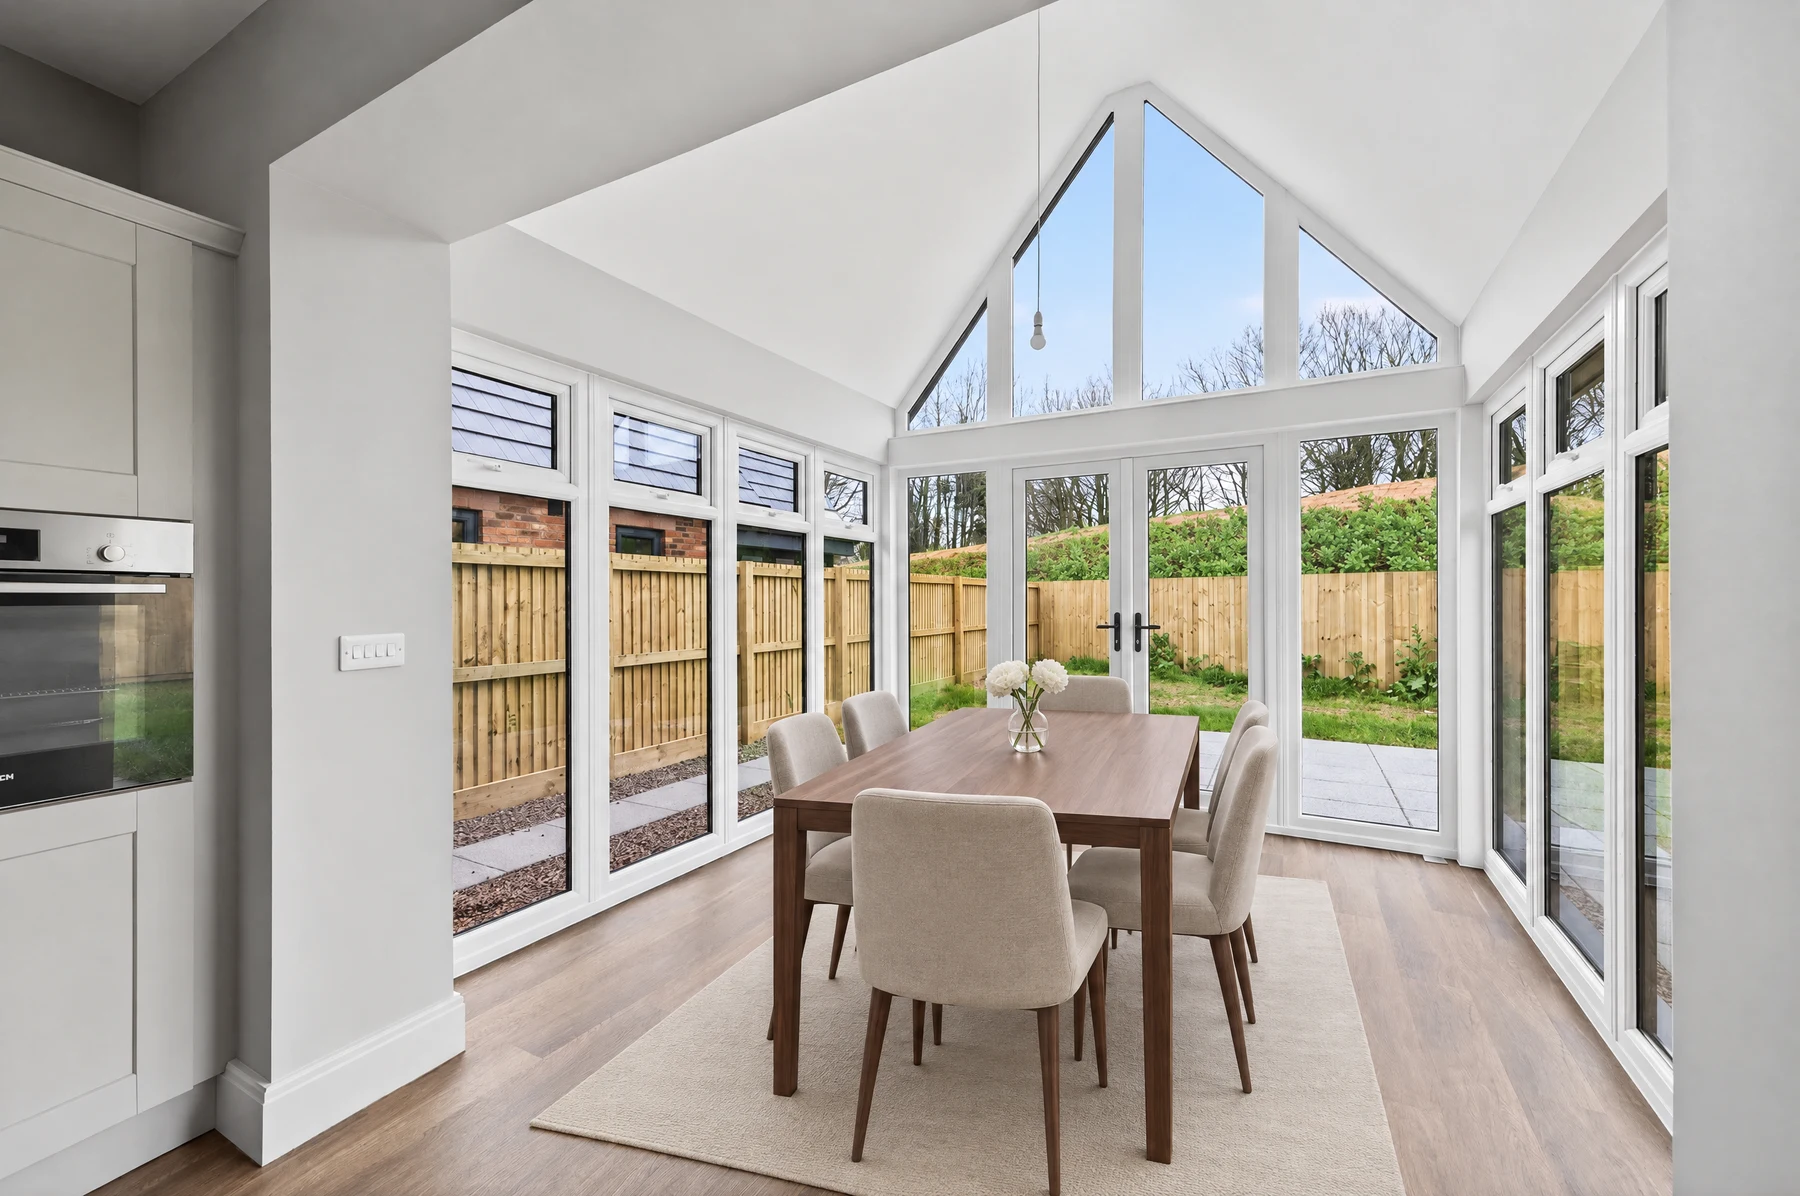
Staged dining room from the second viewpoint, with the wooden table and upholstered chairsTHE MATCHING VIEW
The first staged view of the same dining room
IT STARTED WITH THIS LOOKSame room.
Another perspective.
See the originals & results →

Start with two or more photos of the same room.

Available with Professional, Expert or an active 30-day Professional pass, using Precision Fast or Precision Pro.

How to stage the same room from multiple angles.

Follow one dining room from upload to finished views. These screenshots show the same room throughout, using Precision Pro at 2K. Tap any screenshot to enlarge it.

1Open room staging

In the image editor, click Rooms. On the rooms page, choose Create a room. Each room keeps its photos and staged results together.

ListingAI image editor with the Rooms shortcut in its navigationView full size
Click Rooms in the image editor to open your room collection.

2Upload the original views together

Choose at least two original photos of the same room. Wait for their previews to load, confirm These photos show the same room, and select Create room. A room can hold more than two views; you can add more later.
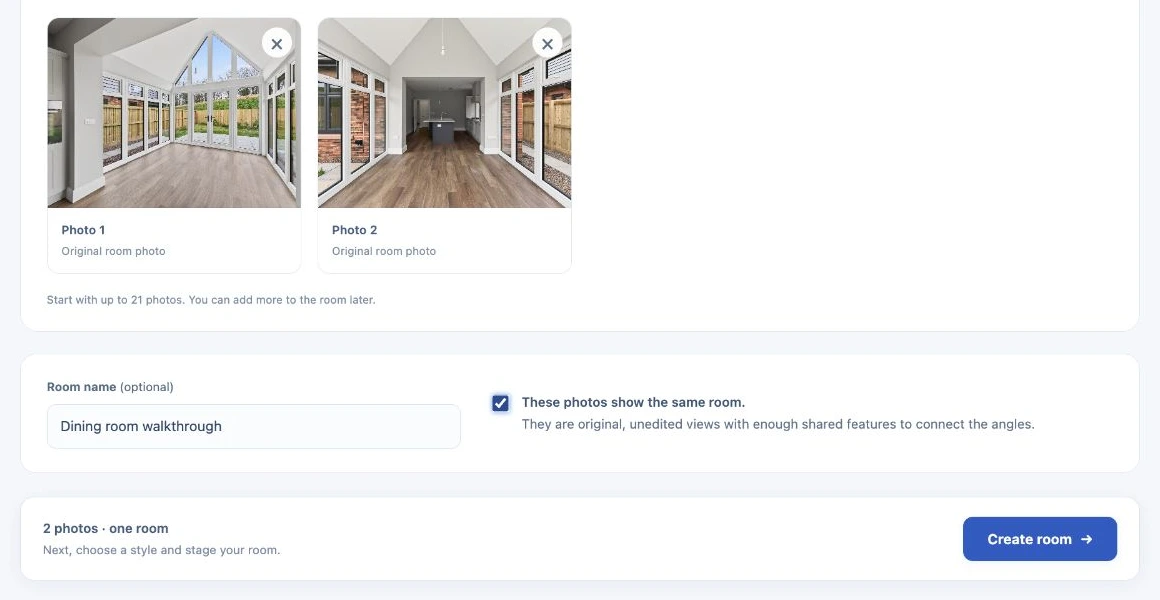
Room setup showing original photos together and the same-room confirmationView full size
Upload the different viewpoints together. The room name is optional; the same-room confirmation is required.

Look for shared features such as windows, doorways and flooring. Use unedited originals for the views you want to stage, and keep different rooms separate. Already have a staged photo to match? You can start with that too.

3Choose the room's look

Inside the room, choose Room type and Design style, then select an Image model and Resolution. Open the photo you want to start with and click Stage room.
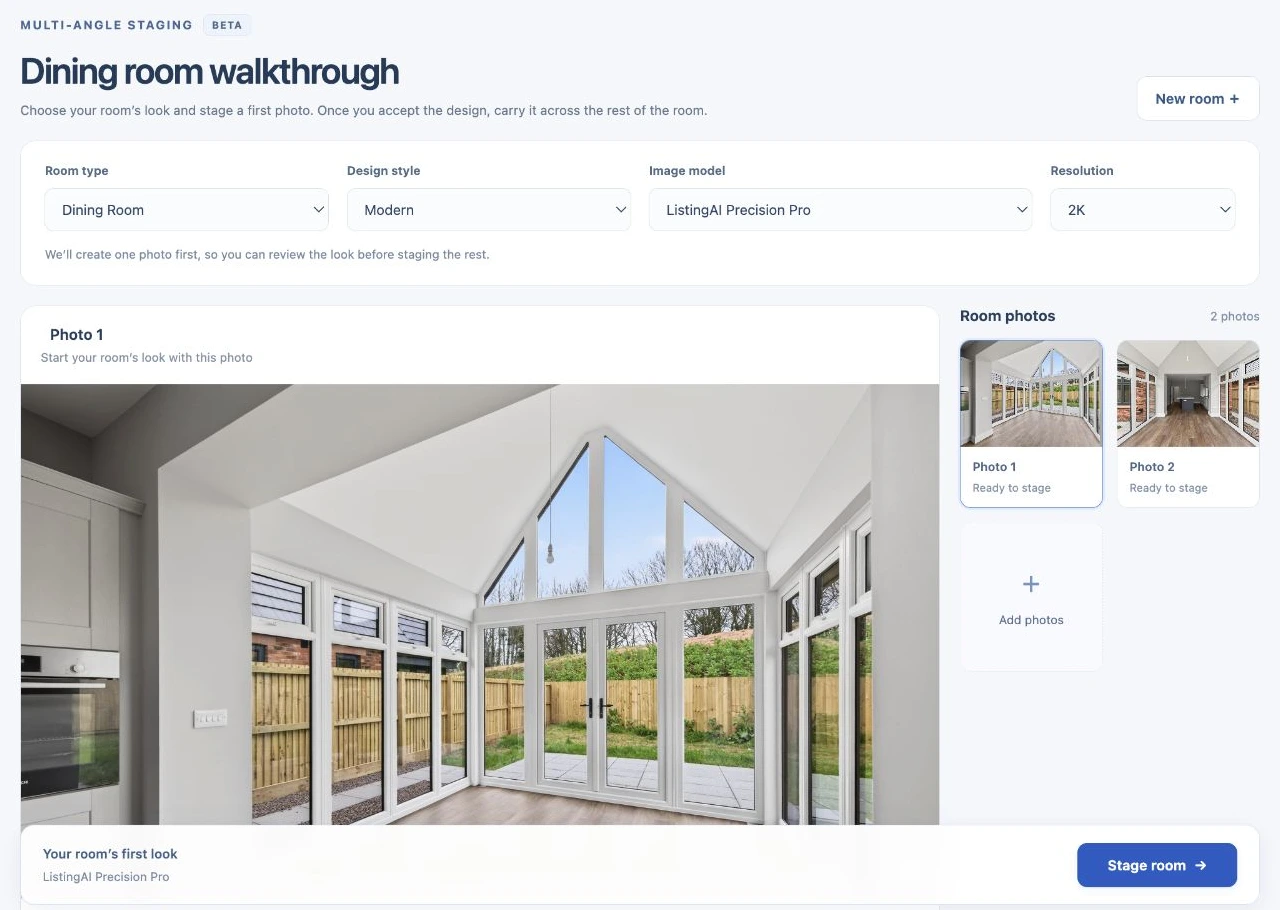
Room workspace with room type, design style, image model, resolution and Stage room controlsView full size
Choose the style once, then create the first look before staging the other photos.

Have a specific request? Add it under Room & style → Additional instructions, such as “Keep the fireplace clear.” Saved instructions apply to future generations in this room.

4Accept the room's first look

Compare the result with the original. Check the furniture, windows, doors and flooring.

Choose Accept result to use this design for the other views, or Reject and try again. The remaining photos wait for your first acceptance.
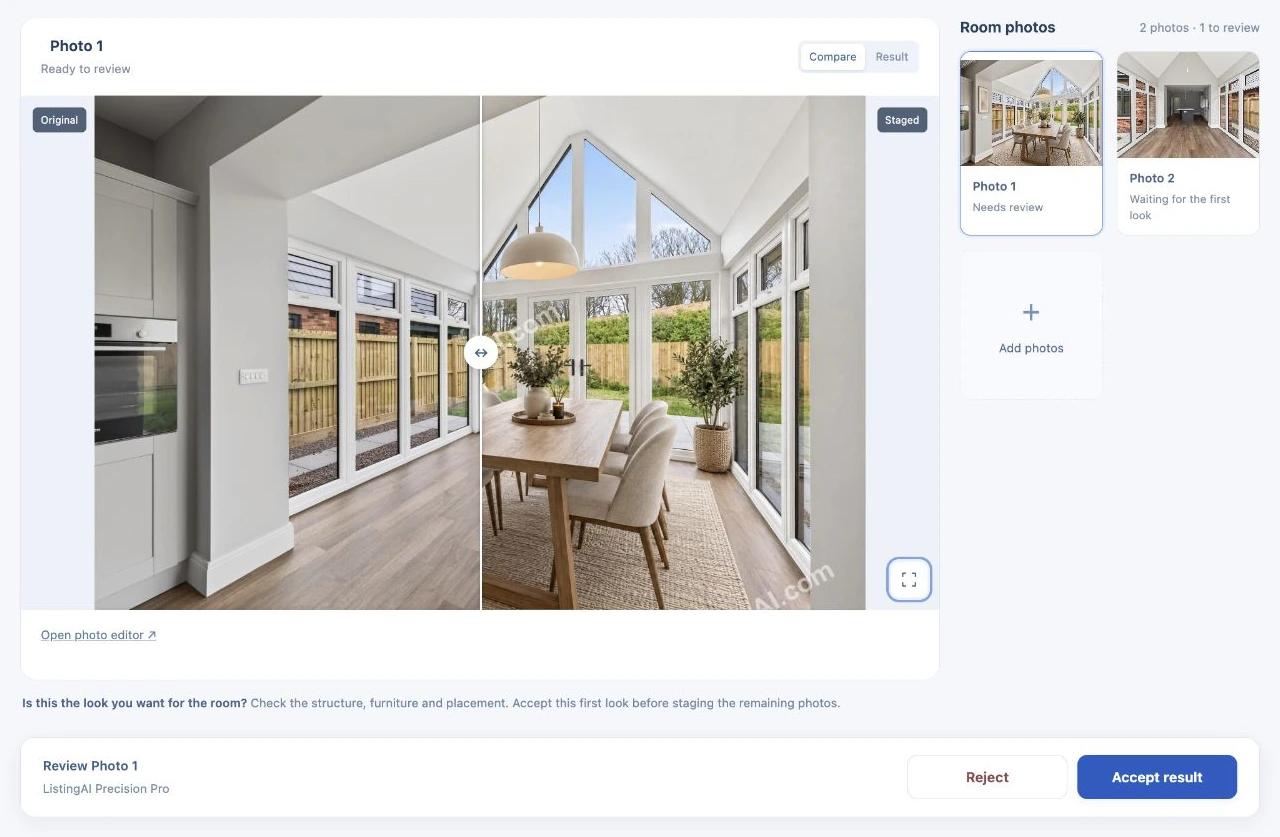
First staged room photo with the before-and-after comparison and Accept result and Reject controlsView full size
Compare the first result with its original. Accepting it establishes the room design for the remaining views.

5Stage the remaining views

Once the first look is accepted, choose how you want to work through the other photos.

All remaining photos

Generate the remaining views in sequence, in the background. Review and accept each result when you’re ready. Pause to stop work that hasn’t started.

One at a time

Generate and review each view before starting the next. Newly accepted photos can help guide later results.
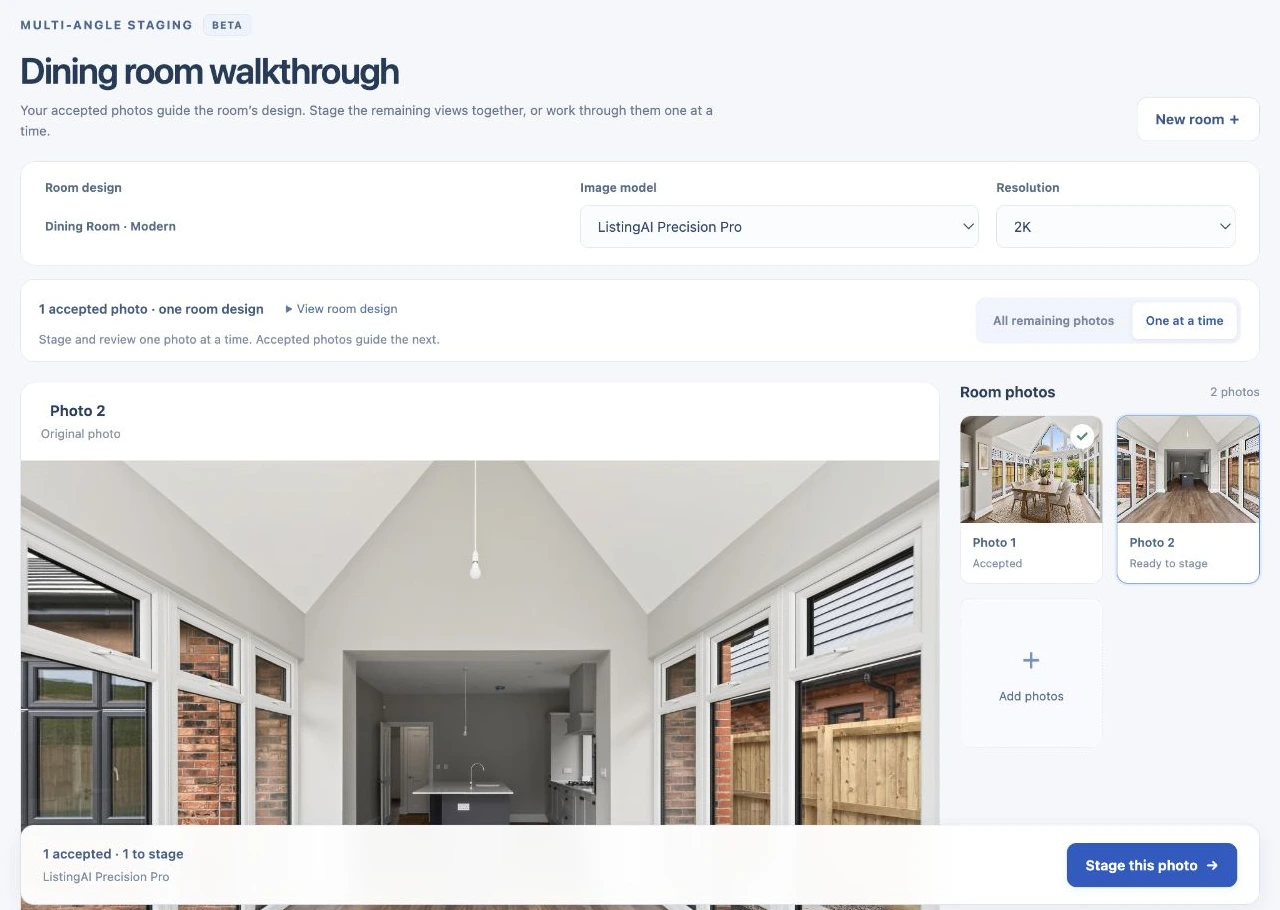
Accepted room design with All remaining photos and One at a time staging choicesView full size
Choose how to continue after the first acceptance. Each new result still has its own review decision.

A failed generation is not silently retried. You can review the outcome and choose whether to try that photo again.

6Review the finished room

Check every view before accepting it and using it in a listing.

  • Check large furniture against fixed landmarks in both views.
  • Look for changes in the number, shape and material of the furnishings.
  • Compare doors, windows, walls and permanent fixtures with the original photos.
  • Review the full image before accepting it and before adding it to your listing.
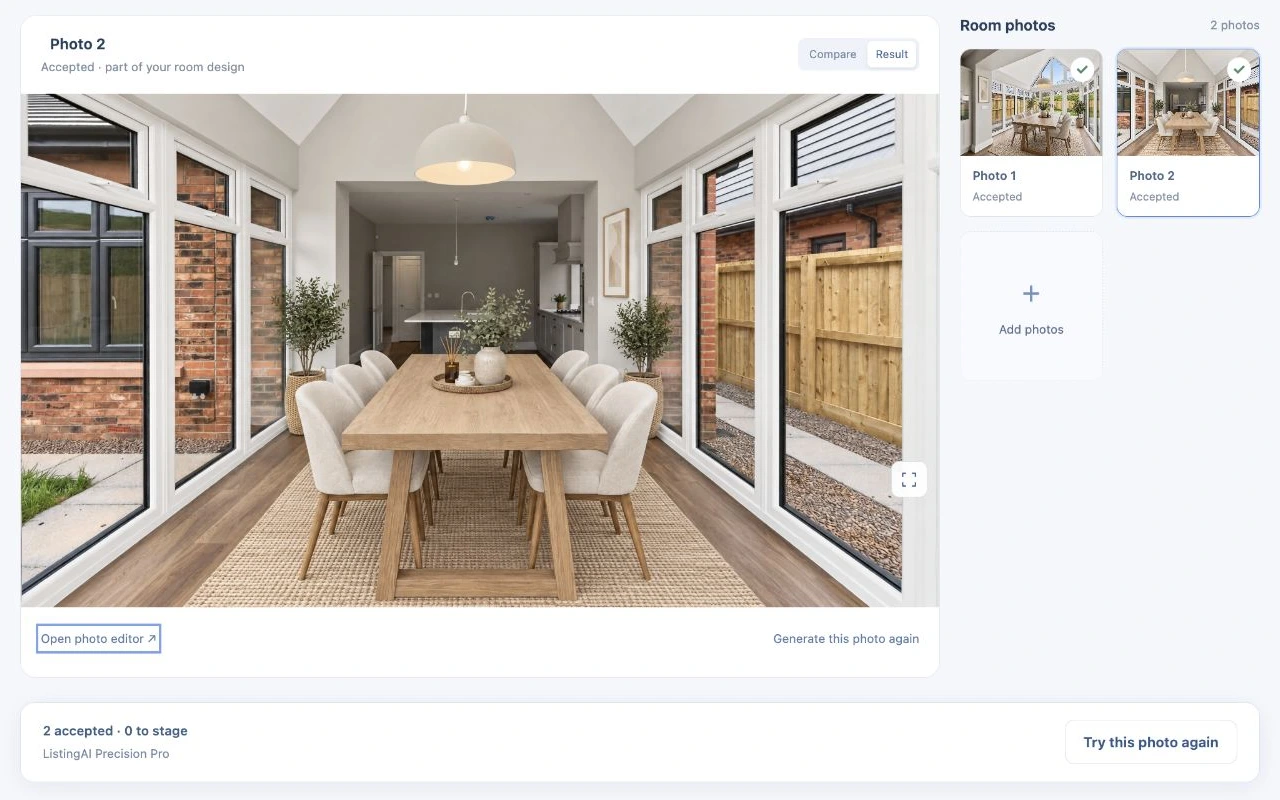
Completed room workspace with accepted photos saved together in the room galleryView full size
Return to the room to review its accepted views together, open a full-size photo or add another original angle.

In this dining room, the table and chairs carry across; the plants change position. Check details like these before using your photos in a listing.

Questions? See the FAQ, feature overview or talk to our team.

Already staged one photo? Start there.

Open an accepted result and choose Add to a room. Select Create a new room or choose an existing room, then add the other original views. Reusing that accepted design adds no generation charge.

Accepted staged photoAdd to a roomNew or existing room

Only have the staged JPG? Upload it with the other original angles and mark it Already staged · Make other angles match. You don’t need its empty original. It guides the other views and is not regenerated.

Your accepted photos become a design collection.

Accepted views and photos marked Already staged guide later generations. Each new view uses its own original and a selection of the room’s staged photos, with matching originals when available. Pending and rejected results are excluded; adding another angle leaves your saved results intact.

Generate to explore. Accept to keep.

Generating uses credits.

Every new attempt has a generation charge, including a preview you later reject.

Accepting adds a charge.

When you accept a result, its saved acceptance charge is added. Rejecting skips that extra charge; it does not return the generation charge.

Uploading is not generating.

Creating a room or adding more original photos does not use generation credits. Neither does reusing an already accepted design.

Rooms use more credits than single-photo edits. Usage depends on the model, output size and references used. We check your balance before generation and acceptance, and tell you if you need more.
Read how room staging uses image credits →

Seven rooms. Fourteen staged views.

Explore five rooms from our model tests, plus a kids’ room and outdoor living demo with AI-created source photos. Compare each original with its staged result, or open any photo full screen.

Dining room

ListingAI Precision Fast

The wooden dining table, upholstered chairs and flowers carry through to the opposite view. Small differences remain in chair details and placement.

First view
Dining room, first view, staged with ListingAI Precision Fast
The first photo establishes the room’s look.
Matching view
Dining room, matching view, staged with ListingAI Precision Fast
The other angle uses that design as a reference.

Two staged views of the same room. Compare with the originals to inspect the changes.

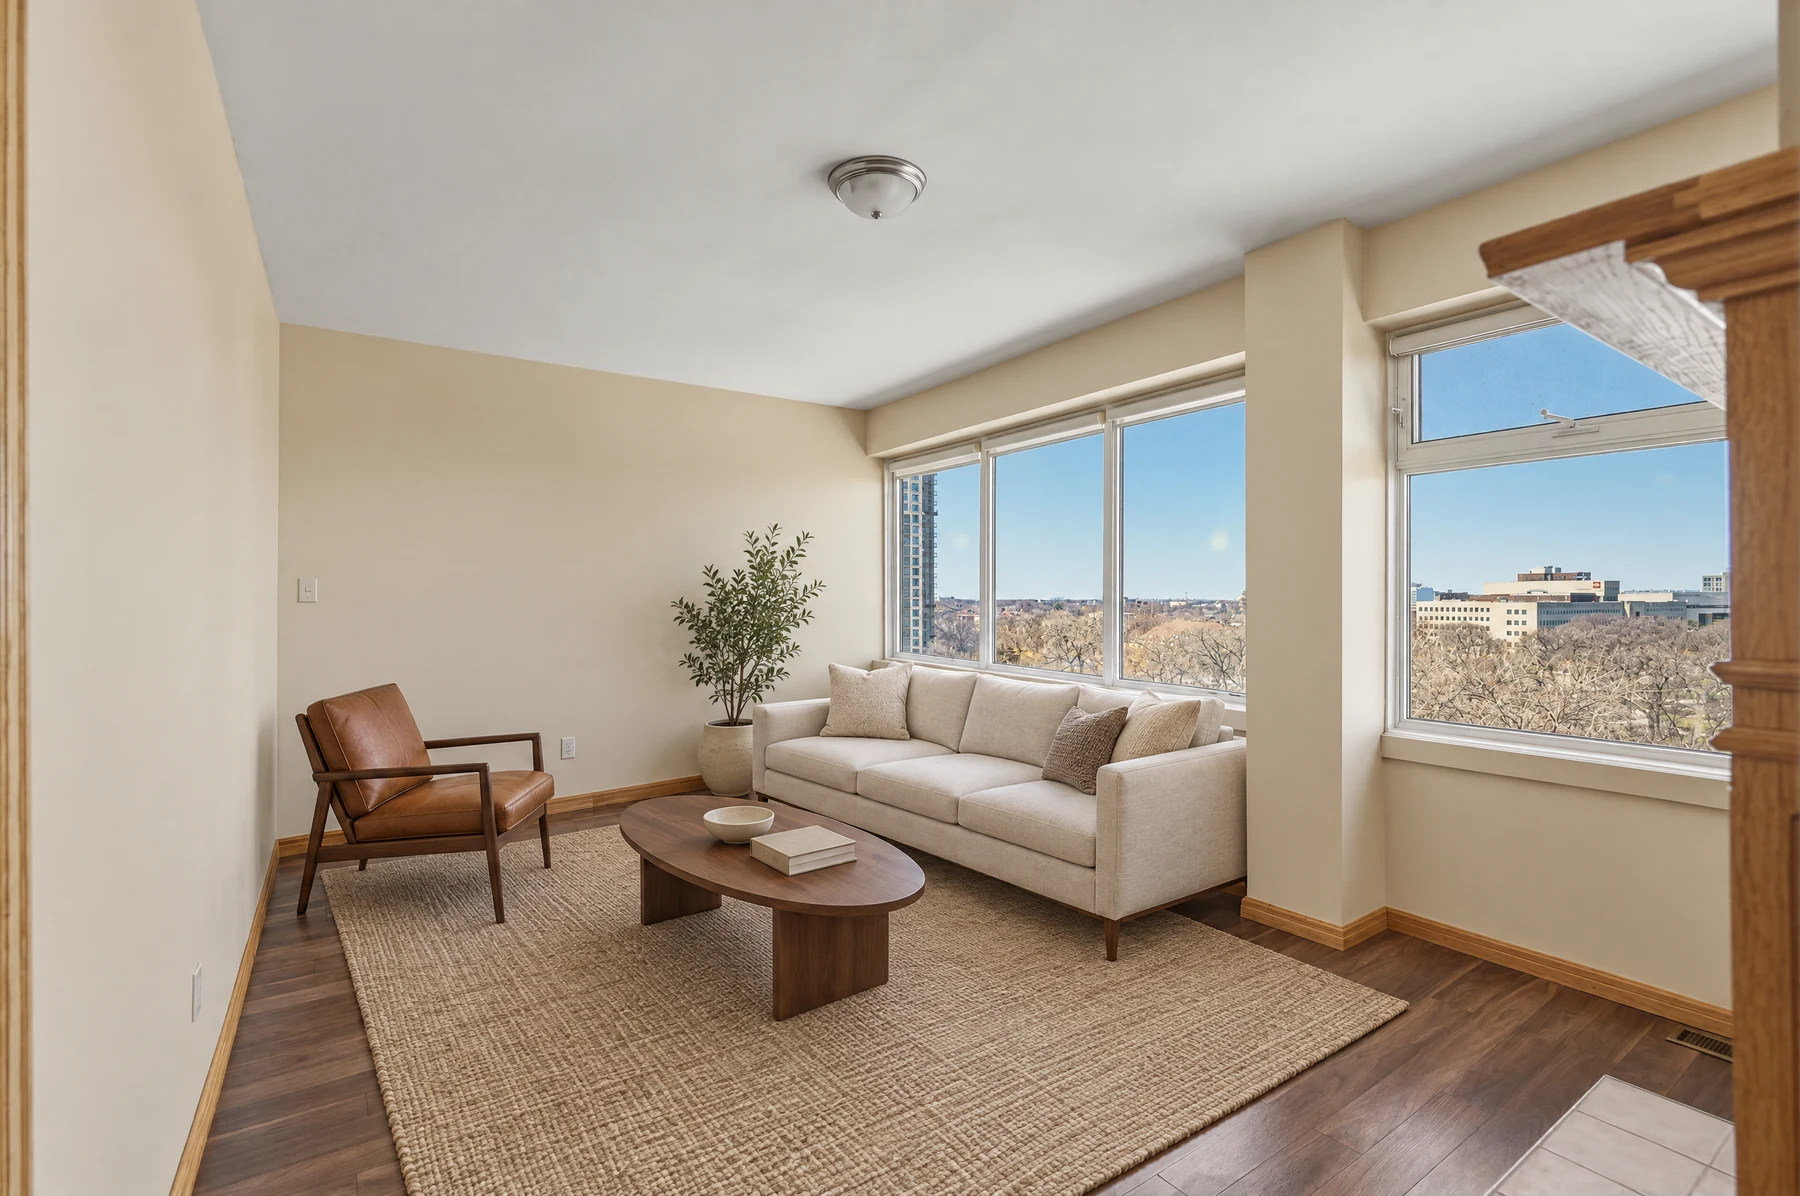
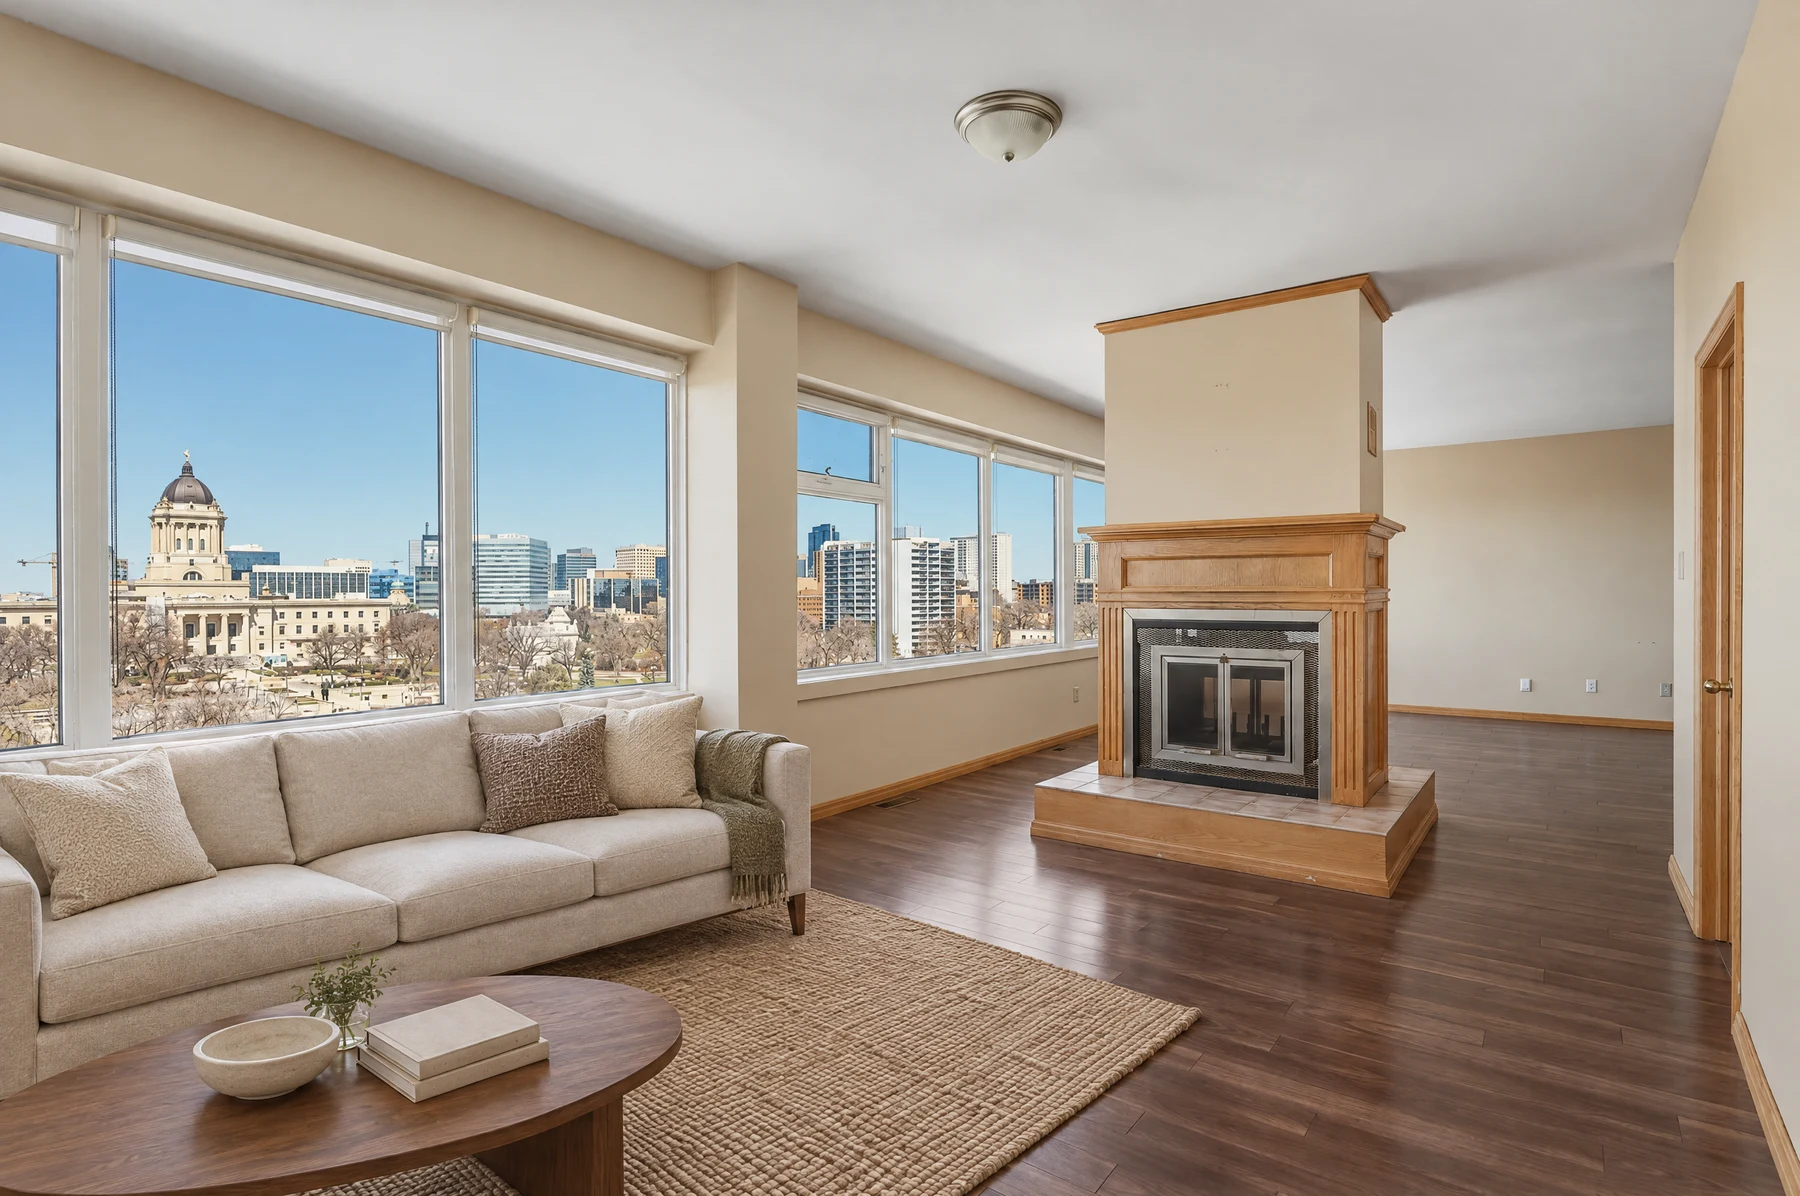
Open living room

ListingAI Precision Fast

The cream sofa, oval wooden coffee table and woven rug carry through to the fireplace view. Cushion arrangements change, and a throw and small vase appear in the second result.

First view
Open living room, first view, staged with ListingAI Precision Fast
The first photo establishes the room’s look.
Matching view
Open living room, matching view, staged with ListingAI Precision Fast
The other angle uses that design as a reference.

Two staged views of the same room. Compare with the originals to inspect the changes.

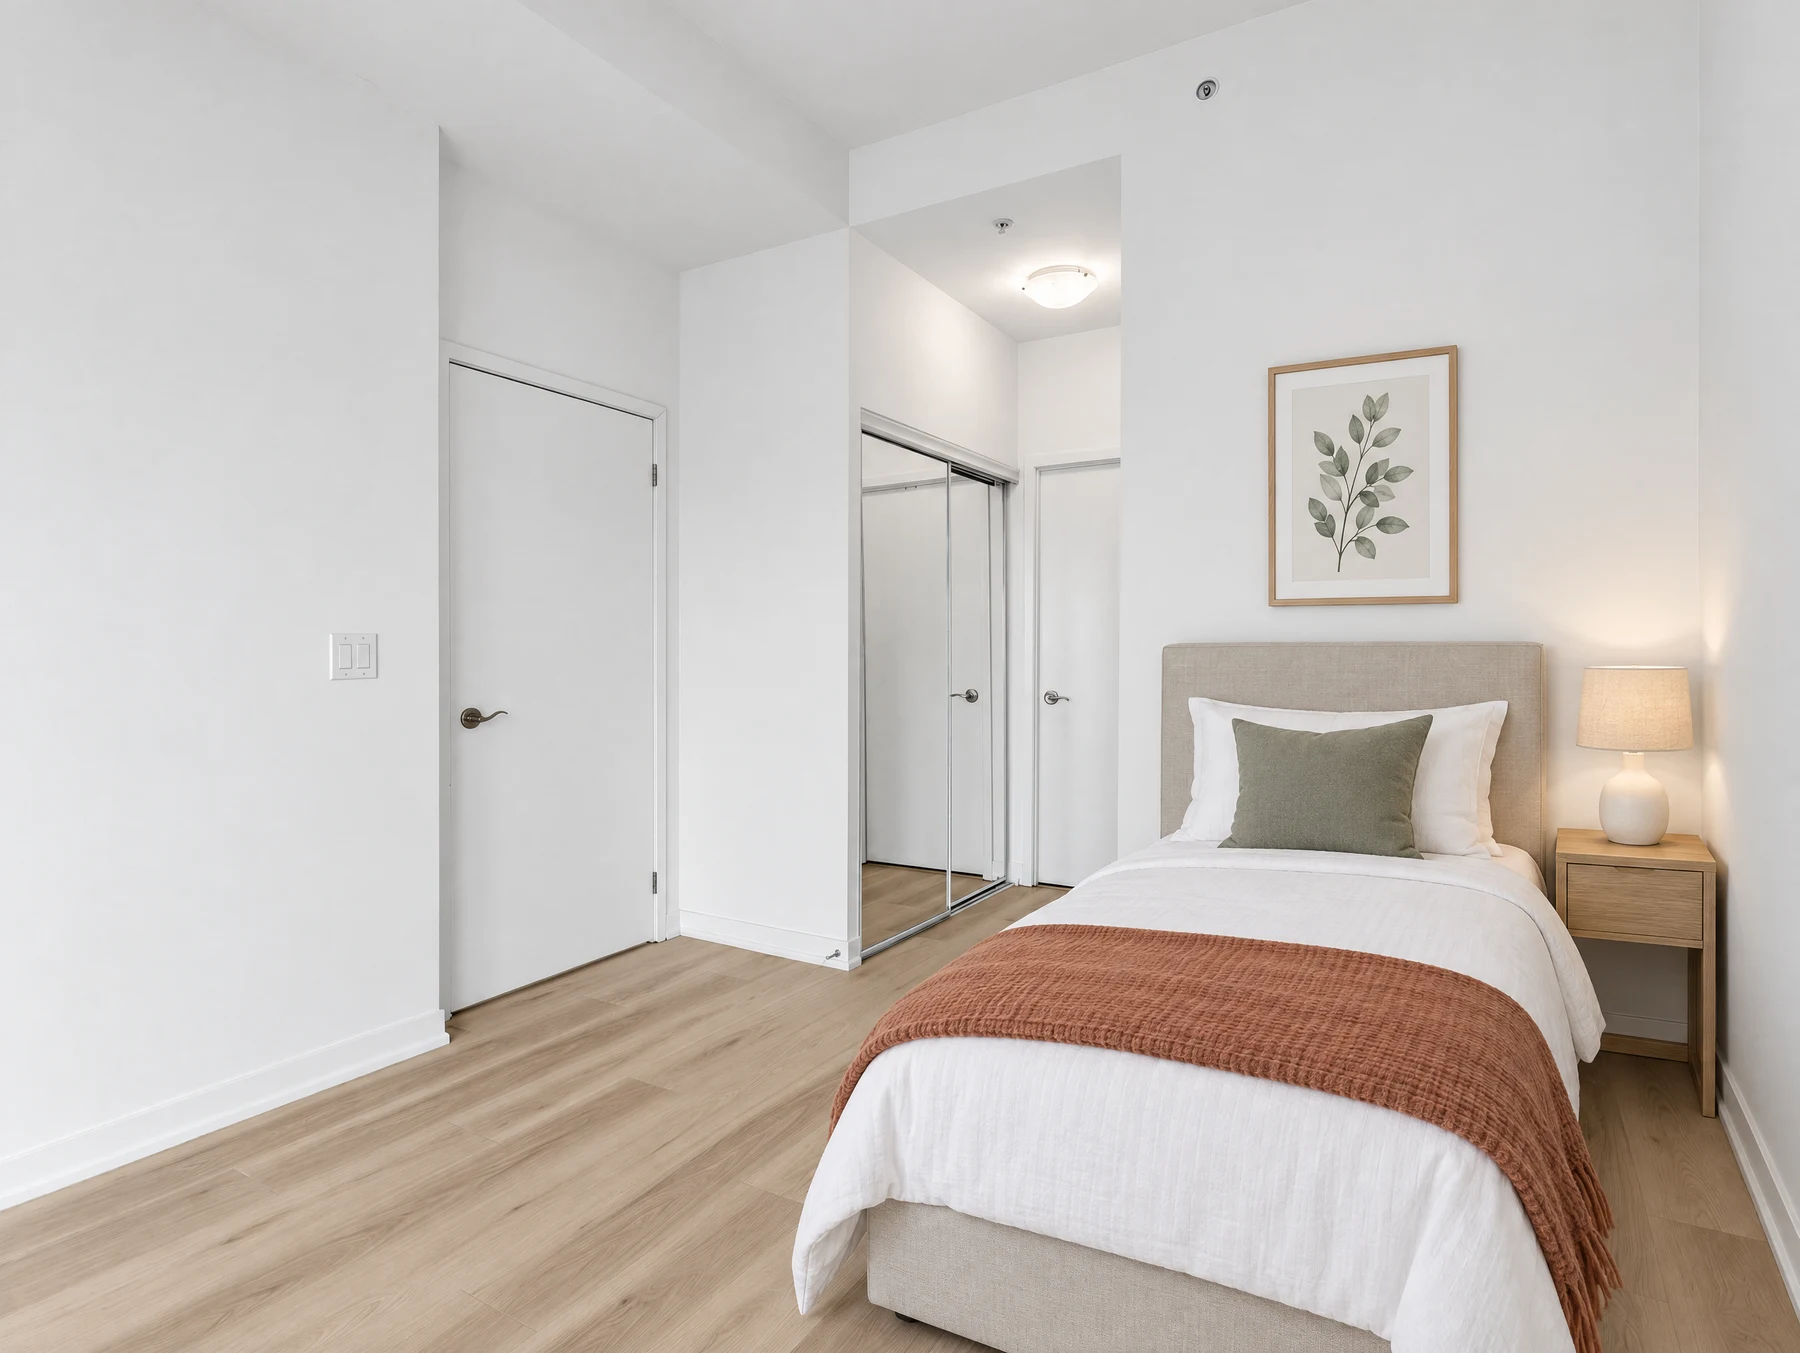
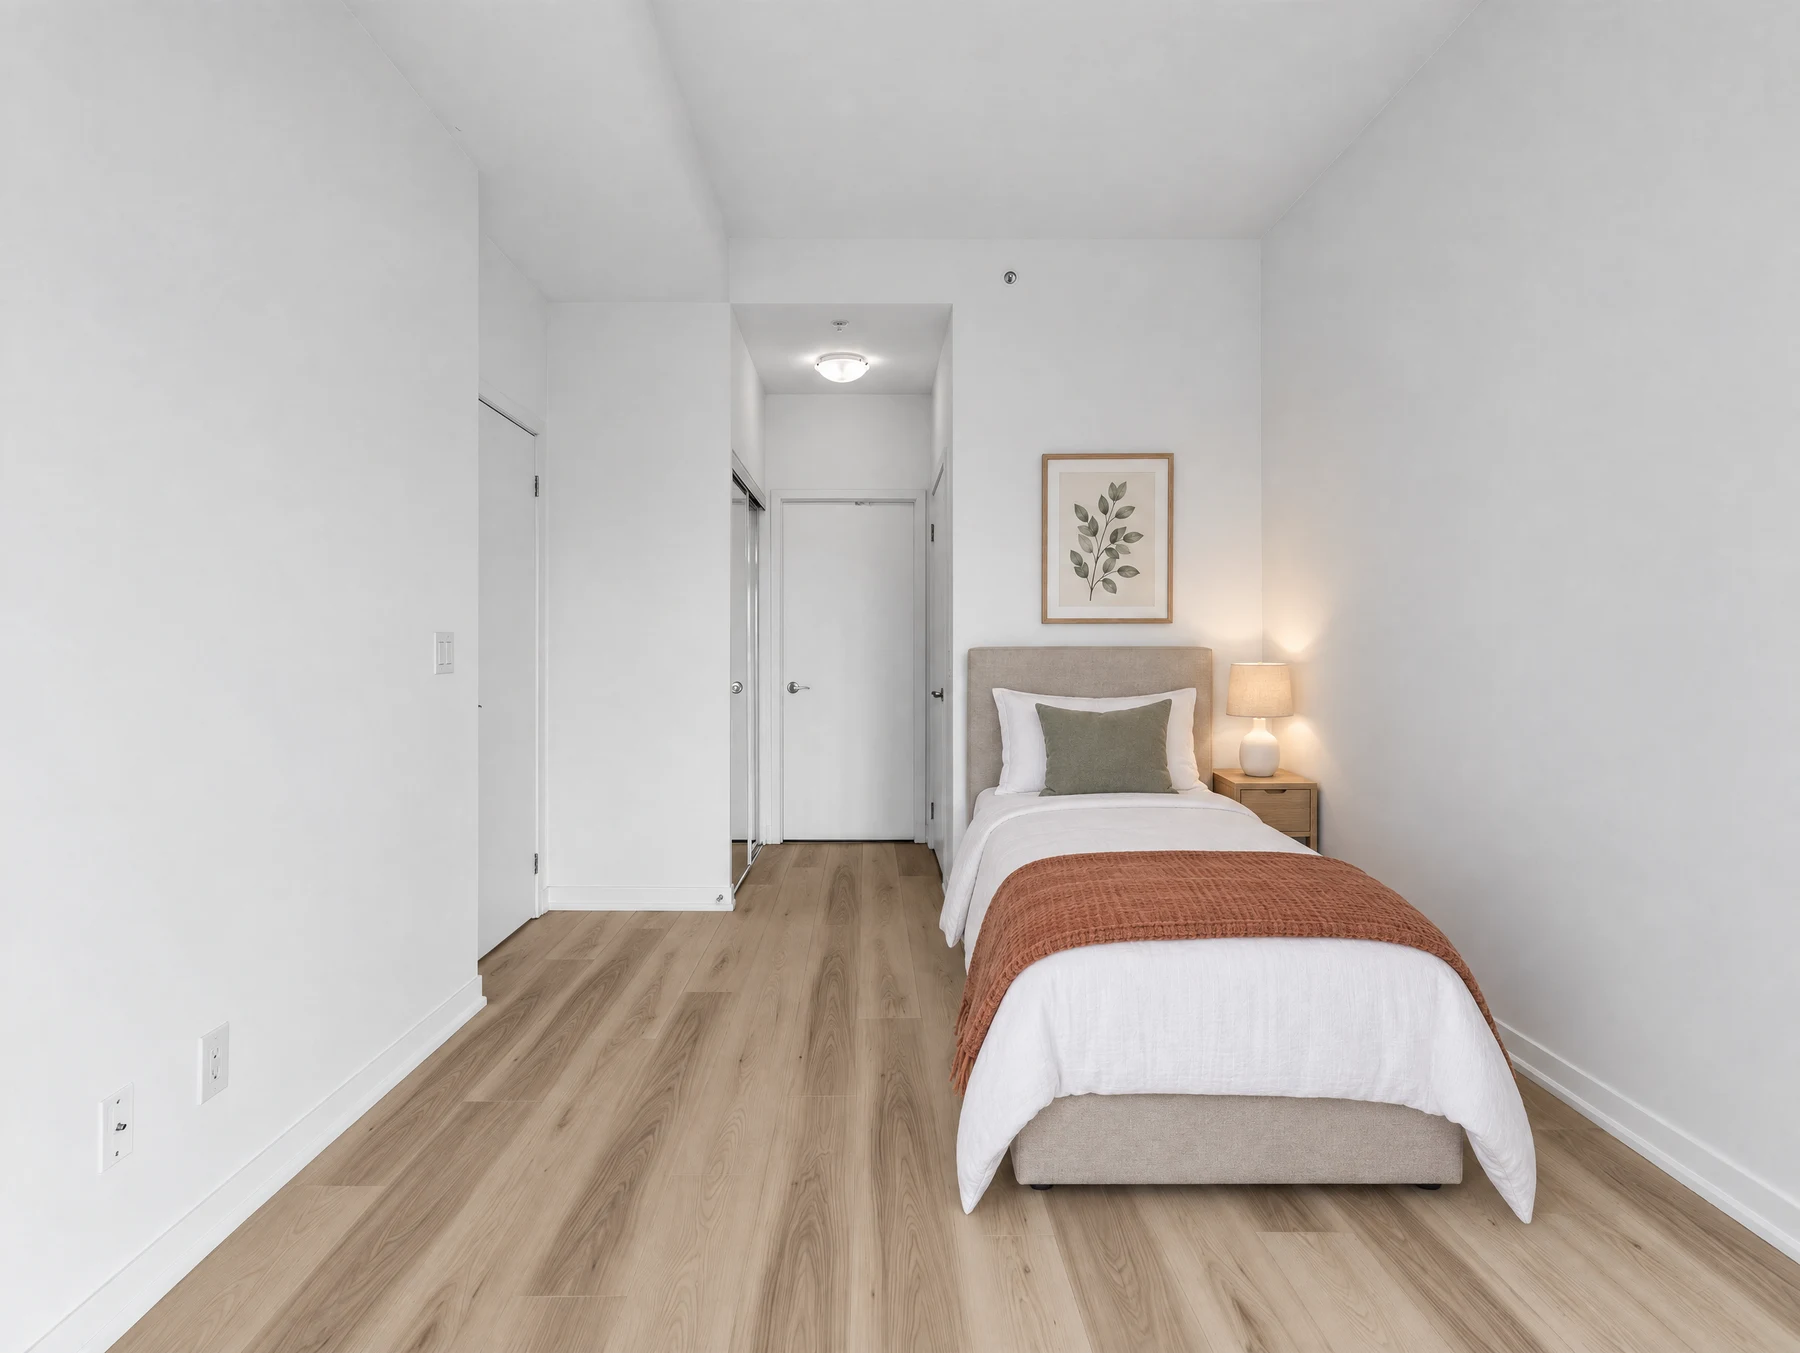
Bedroom

ListingAI Precision Pro

The bed, sage cushion, terracotta throw and bedside table stay together beside the recess. Bedding folds, lamp proportions and artwork details vary slightly.

First view
Bedroom, first view, staged with ListingAI Precision Pro
The first photo establishes the room’s look.
Matching view
Bedroom, matching view, staged with ListingAI Precision Pro
The other angle uses that design as a reference.

Two staged views of the same room. Compare with the originals to inspect the changes.

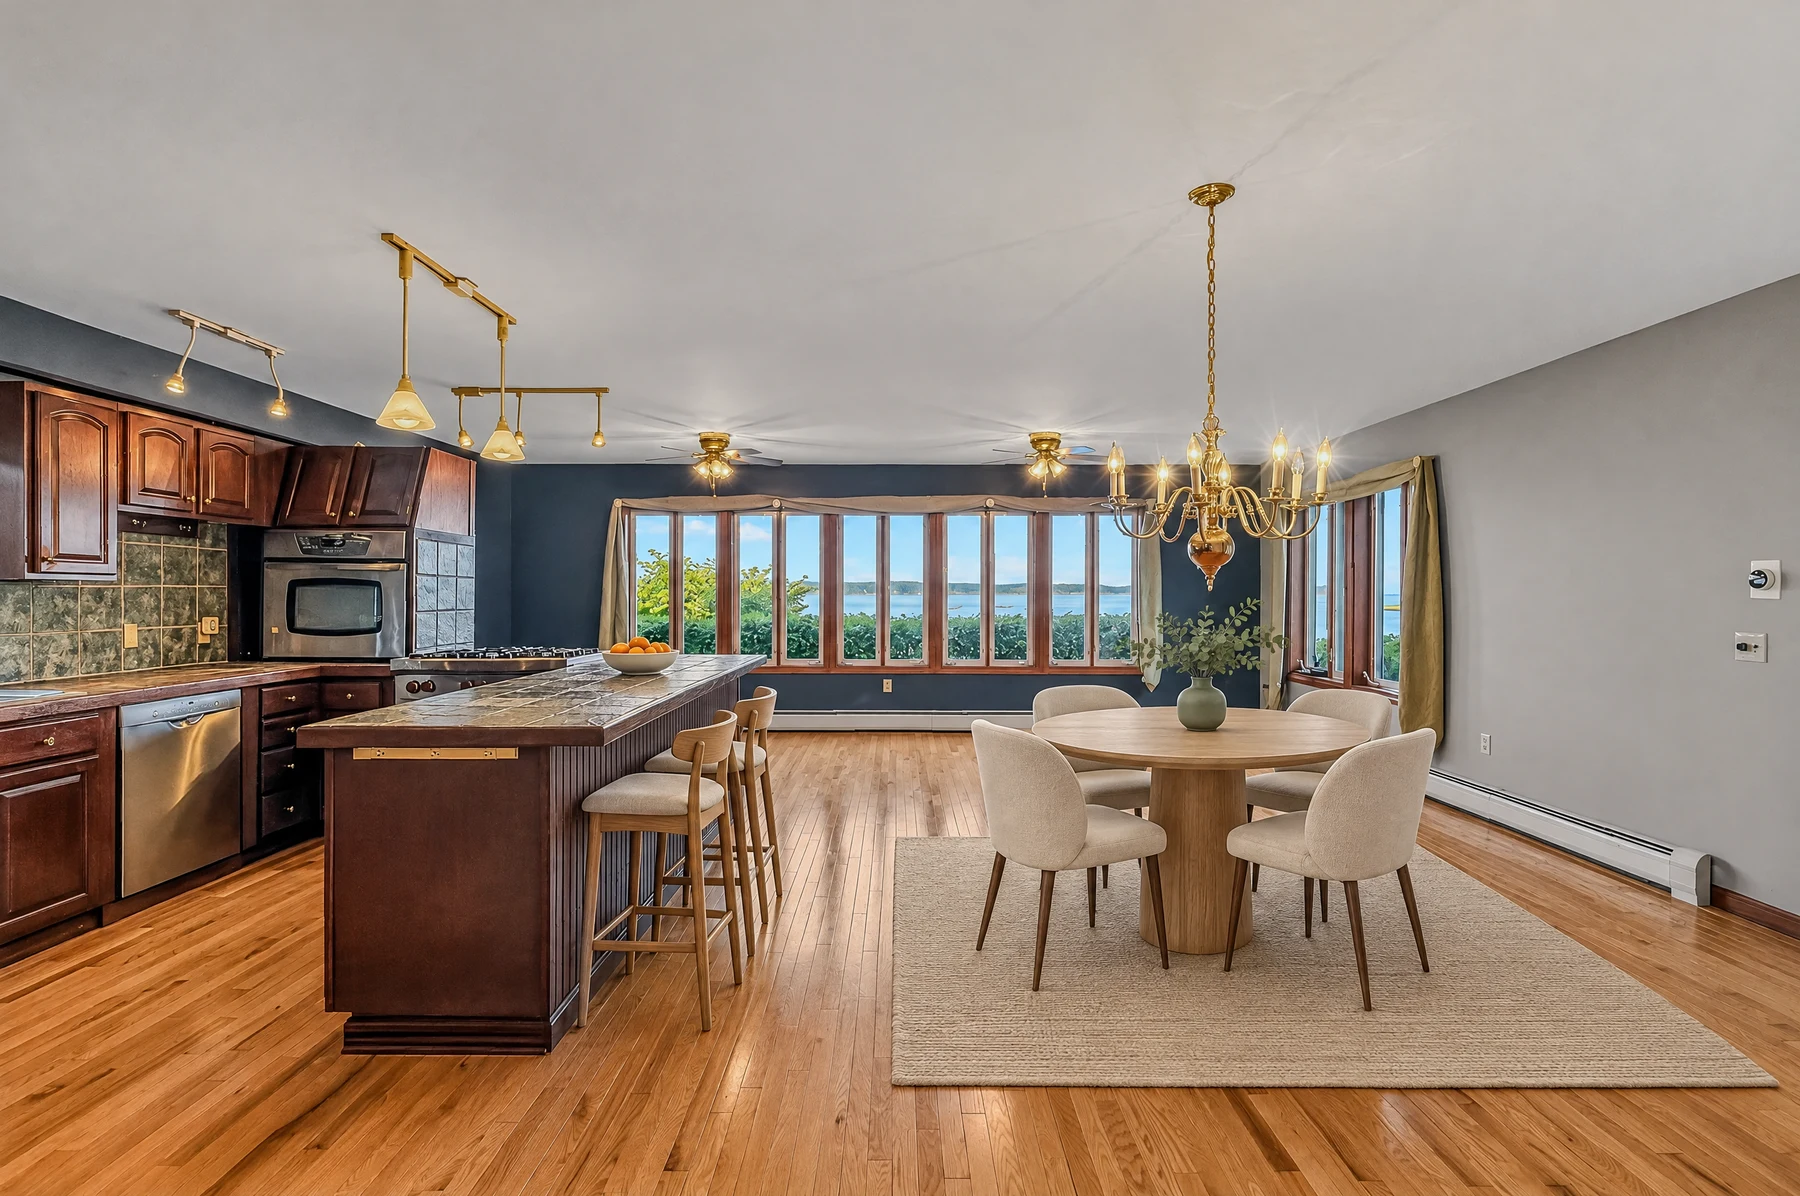
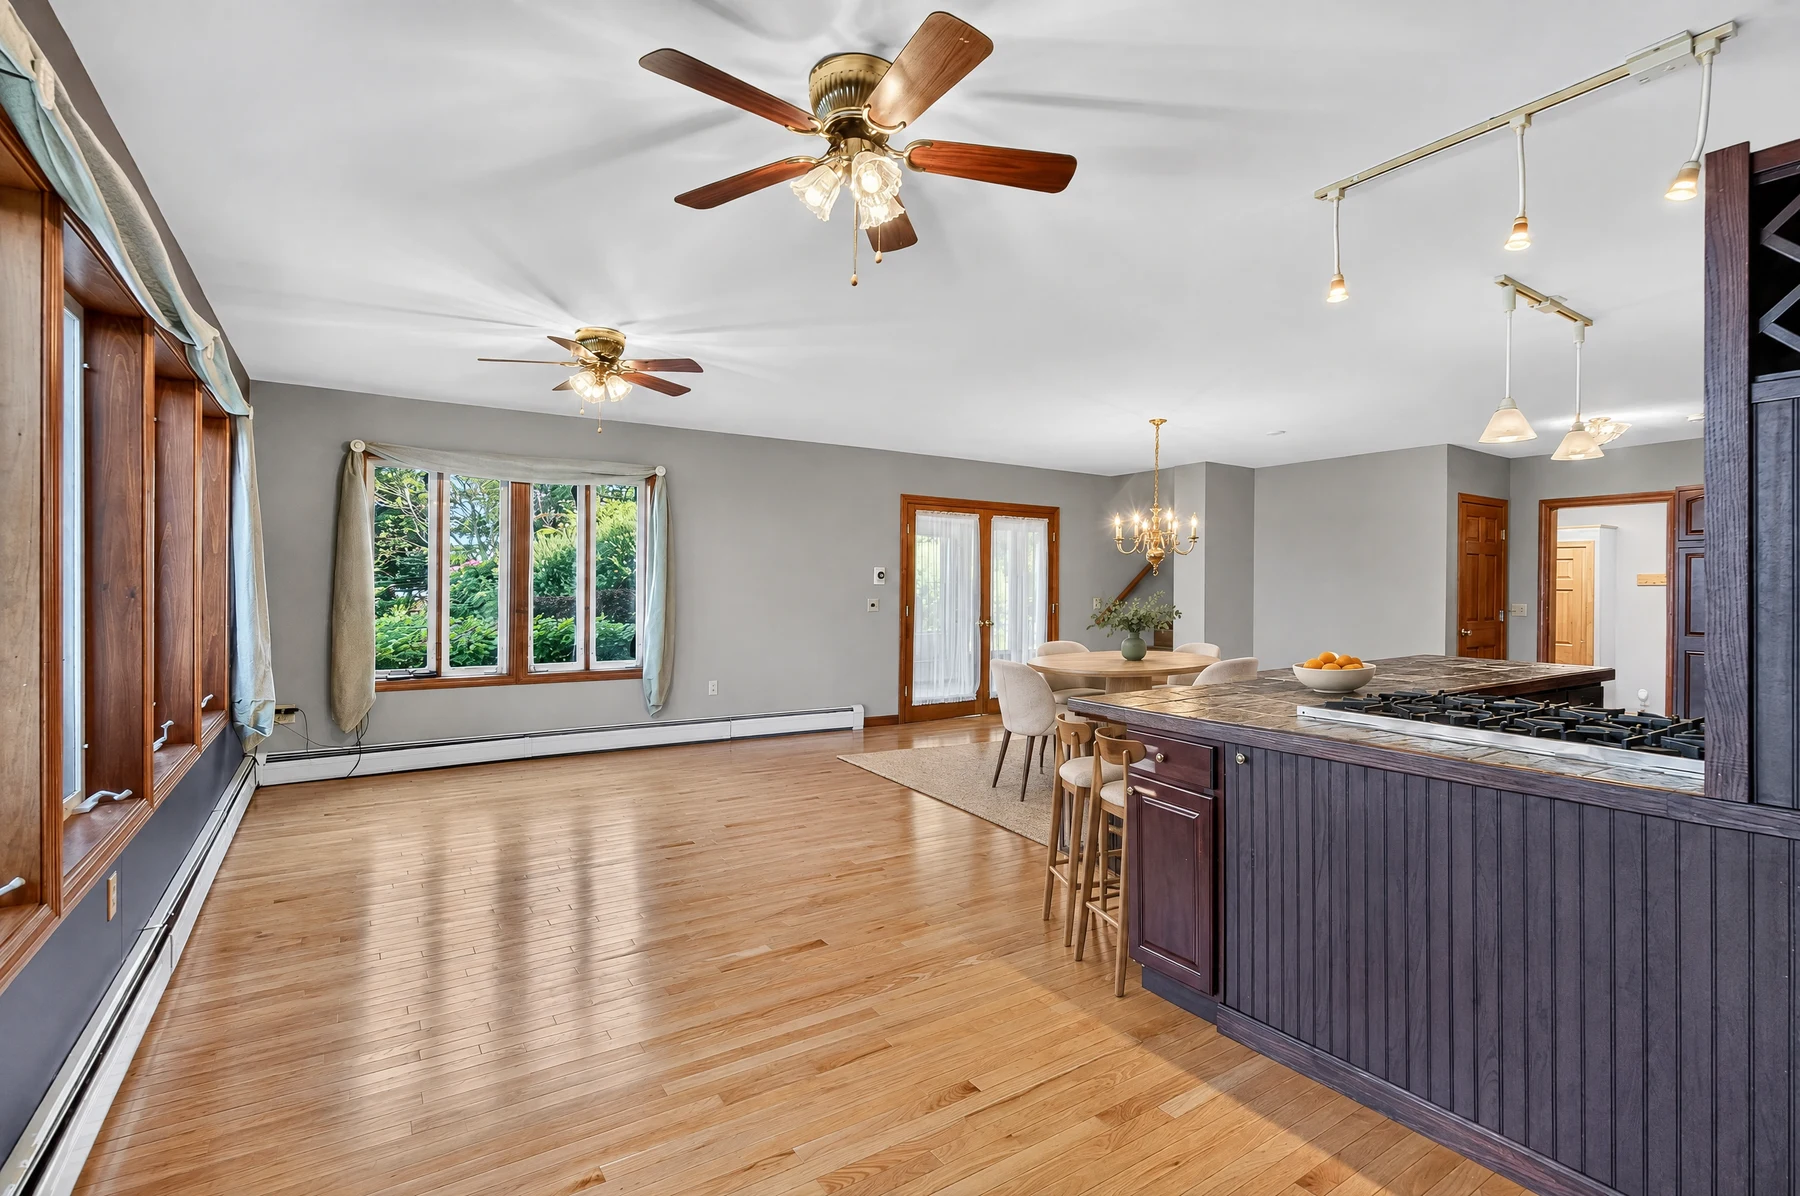
Kitchen

ListingAI Precision Fast

The round dining table, upholstered chairs, rug and island stools repeat from the far end of the kitchen. Chair proportions and the centerpiece vary.

First view
Kitchen, first view, staged with ListingAI Precision Fast
The first photo establishes the room’s look.
Matching view
Kitchen, matching view, staged with ListingAI Precision Fast
The other angle uses that design as a reference.

Two staged views of the same room. Compare with the originals to inspect the changes.

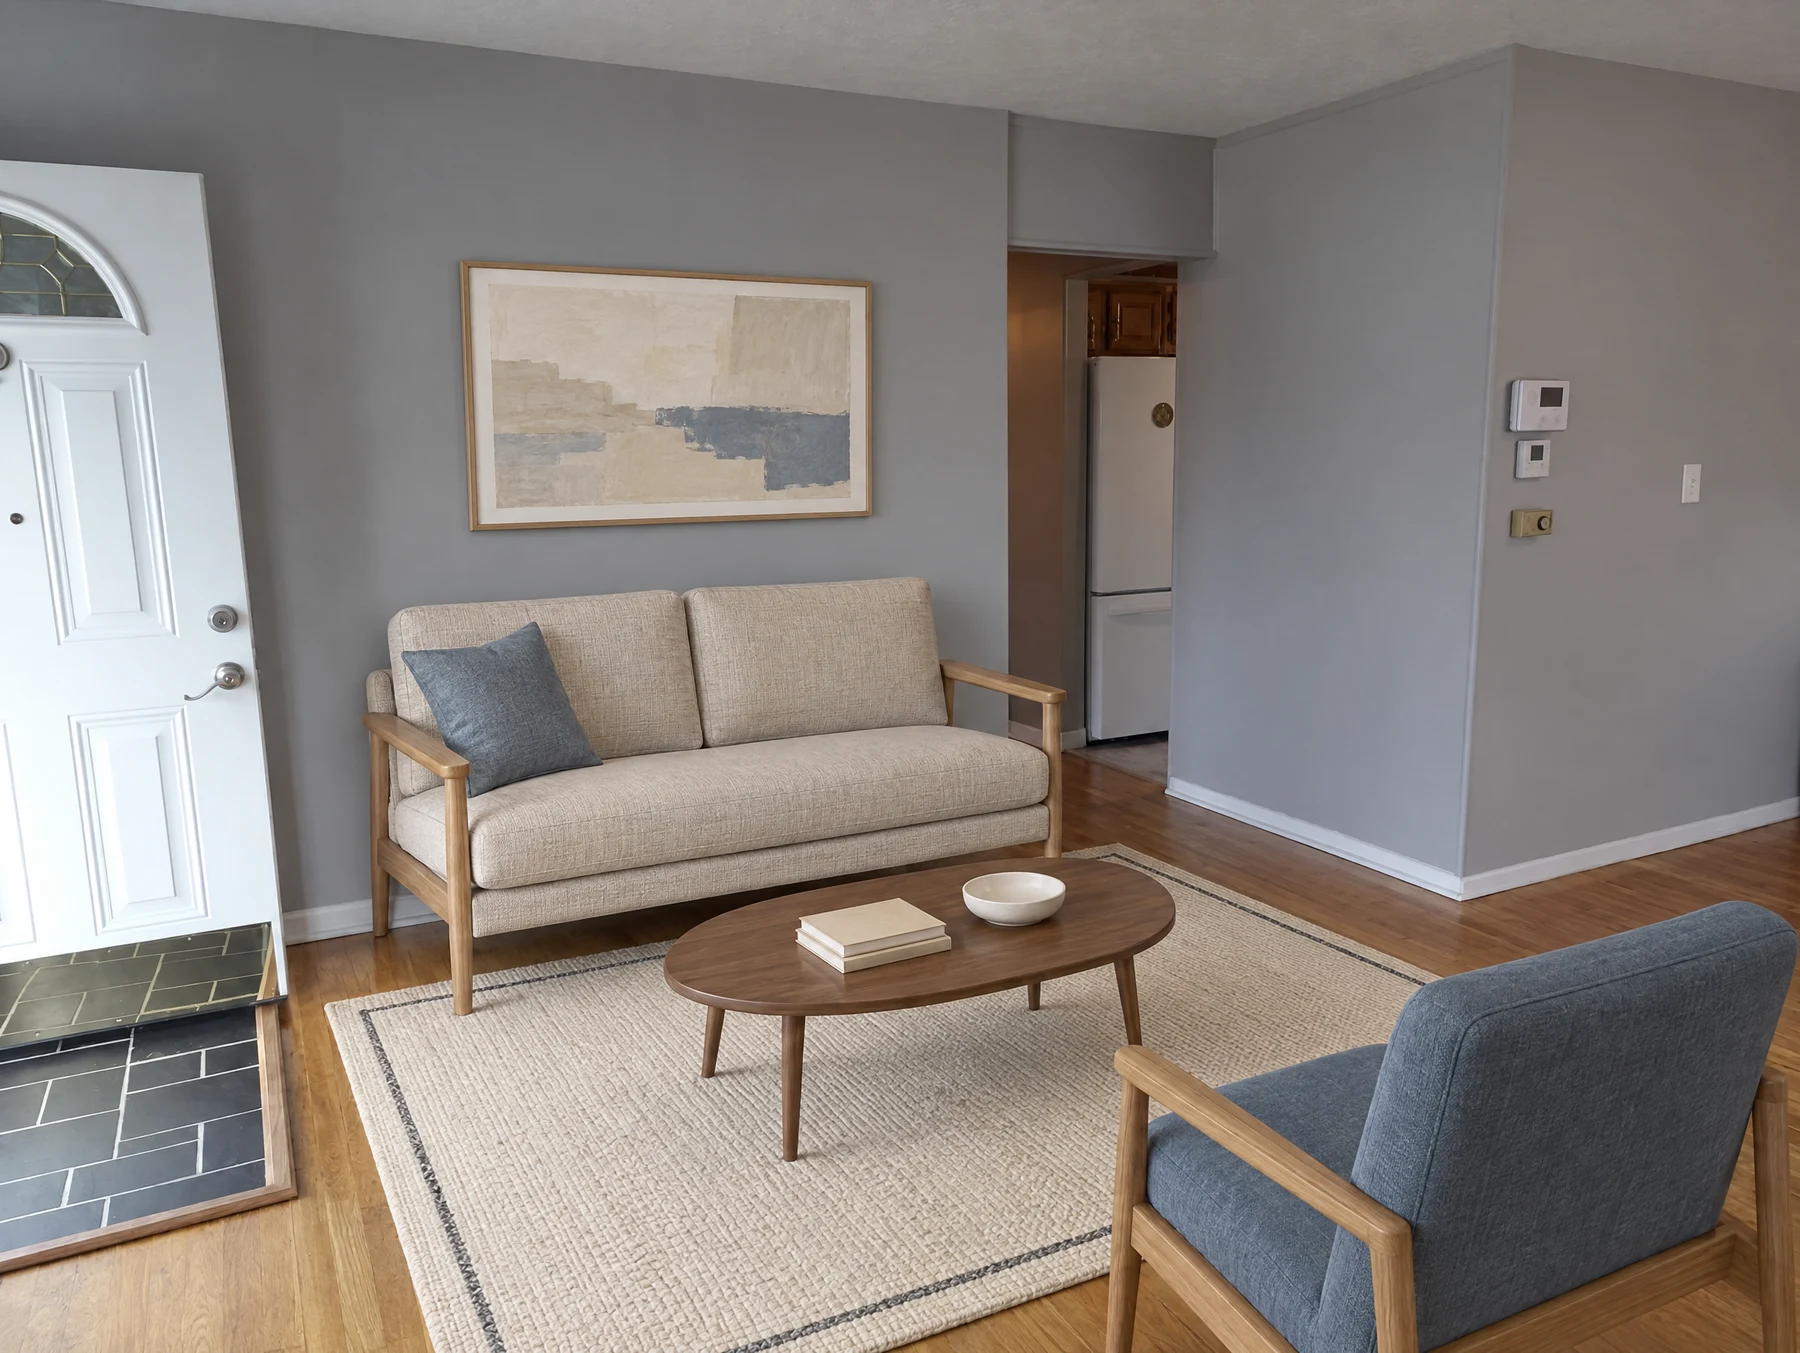
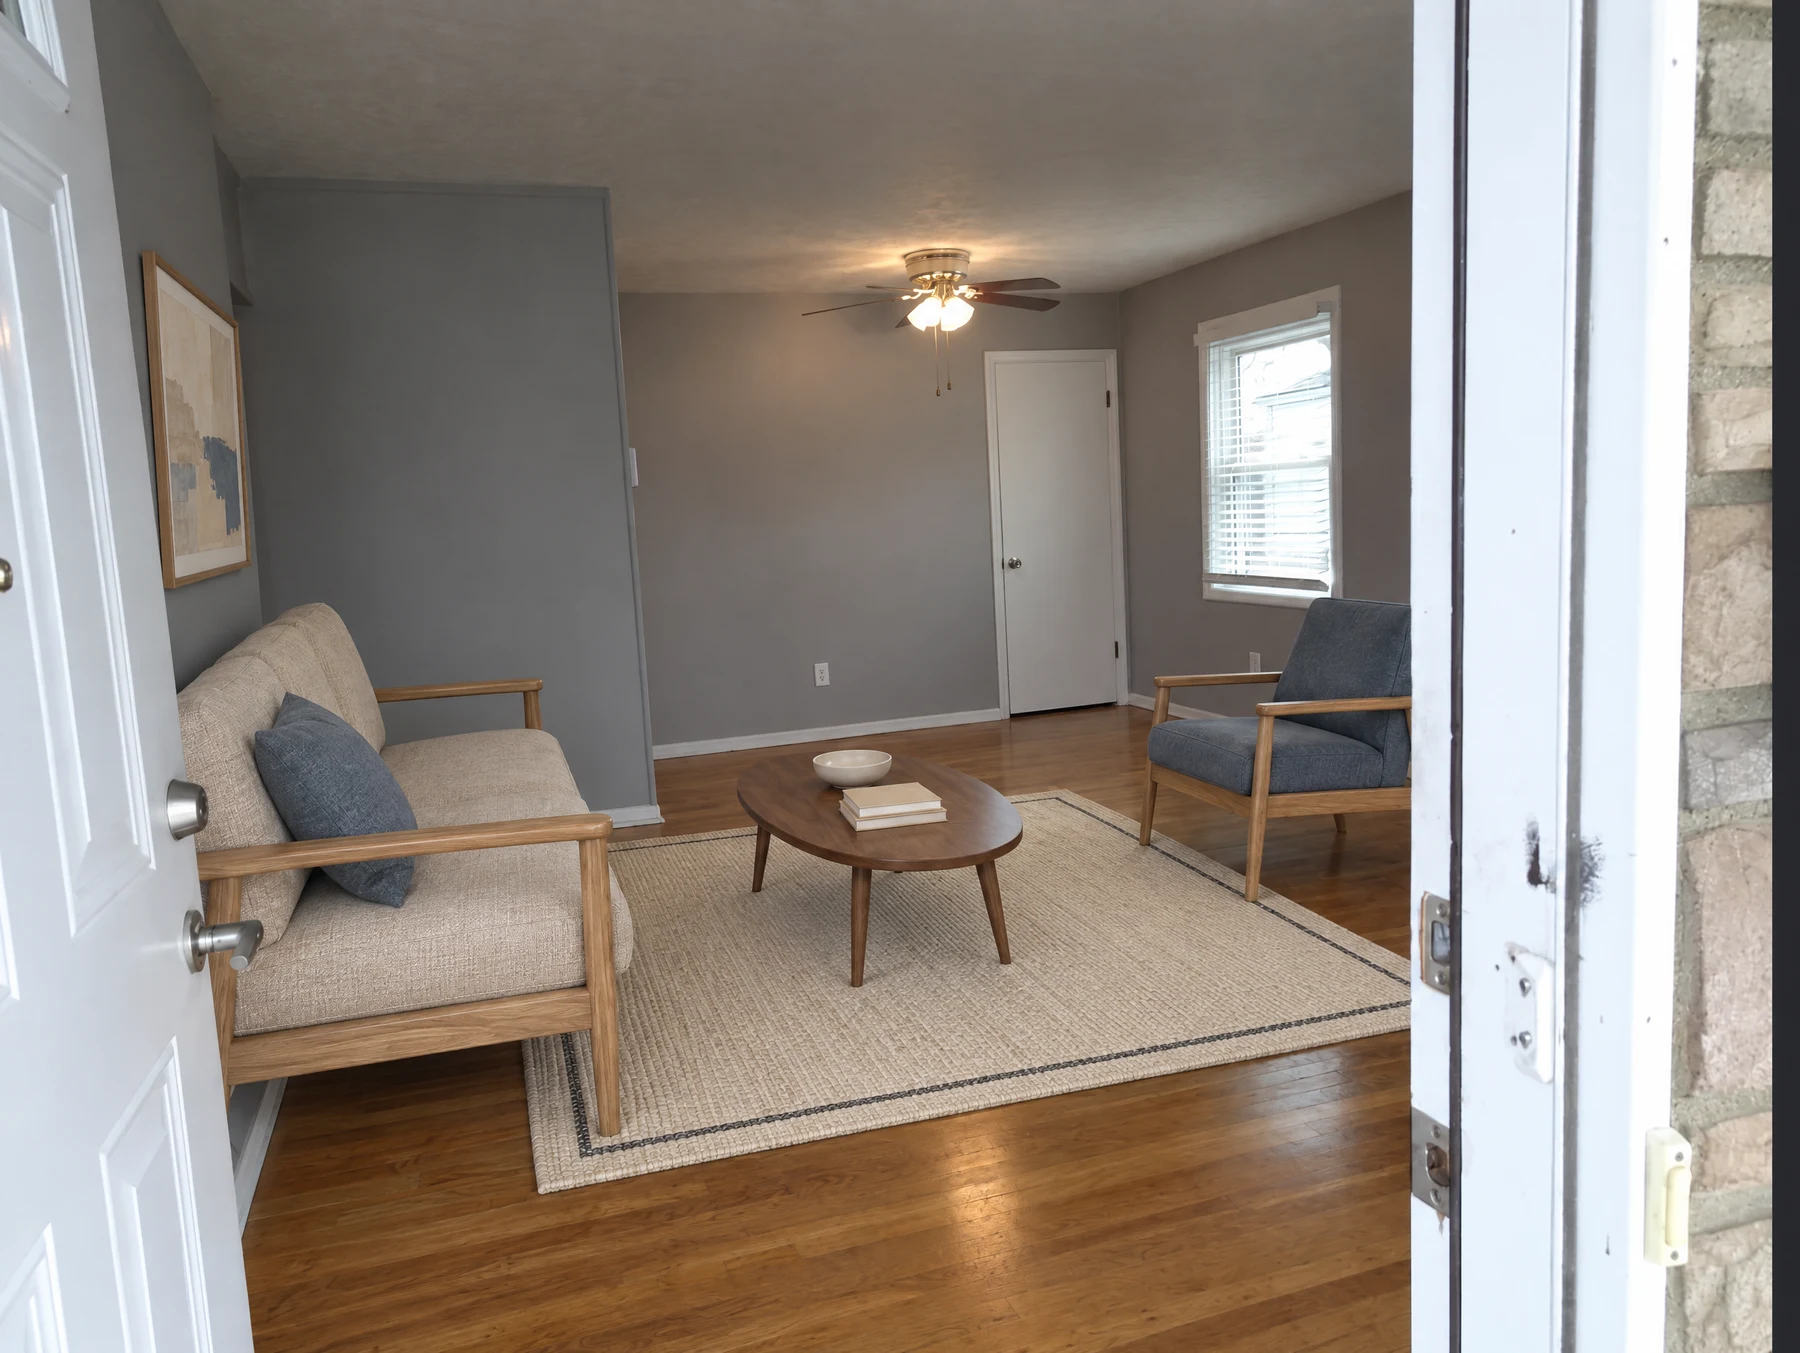
Living room

ListingAI Precision Pro

The sofa, blue armchair, bordered rug and oval coffee table repeat in the doorway view. Table proportions and smaller decor details vary slightly.

First view
Living room, first view, staged with ListingAI Precision Pro
The first photo establishes the room’s look.
Matching view
Living room, matching view, staged with ListingAI Precision Pro
The other angle uses that design as a reference.

Two staged views of the same room. Compare with the originals to inspect the changes.

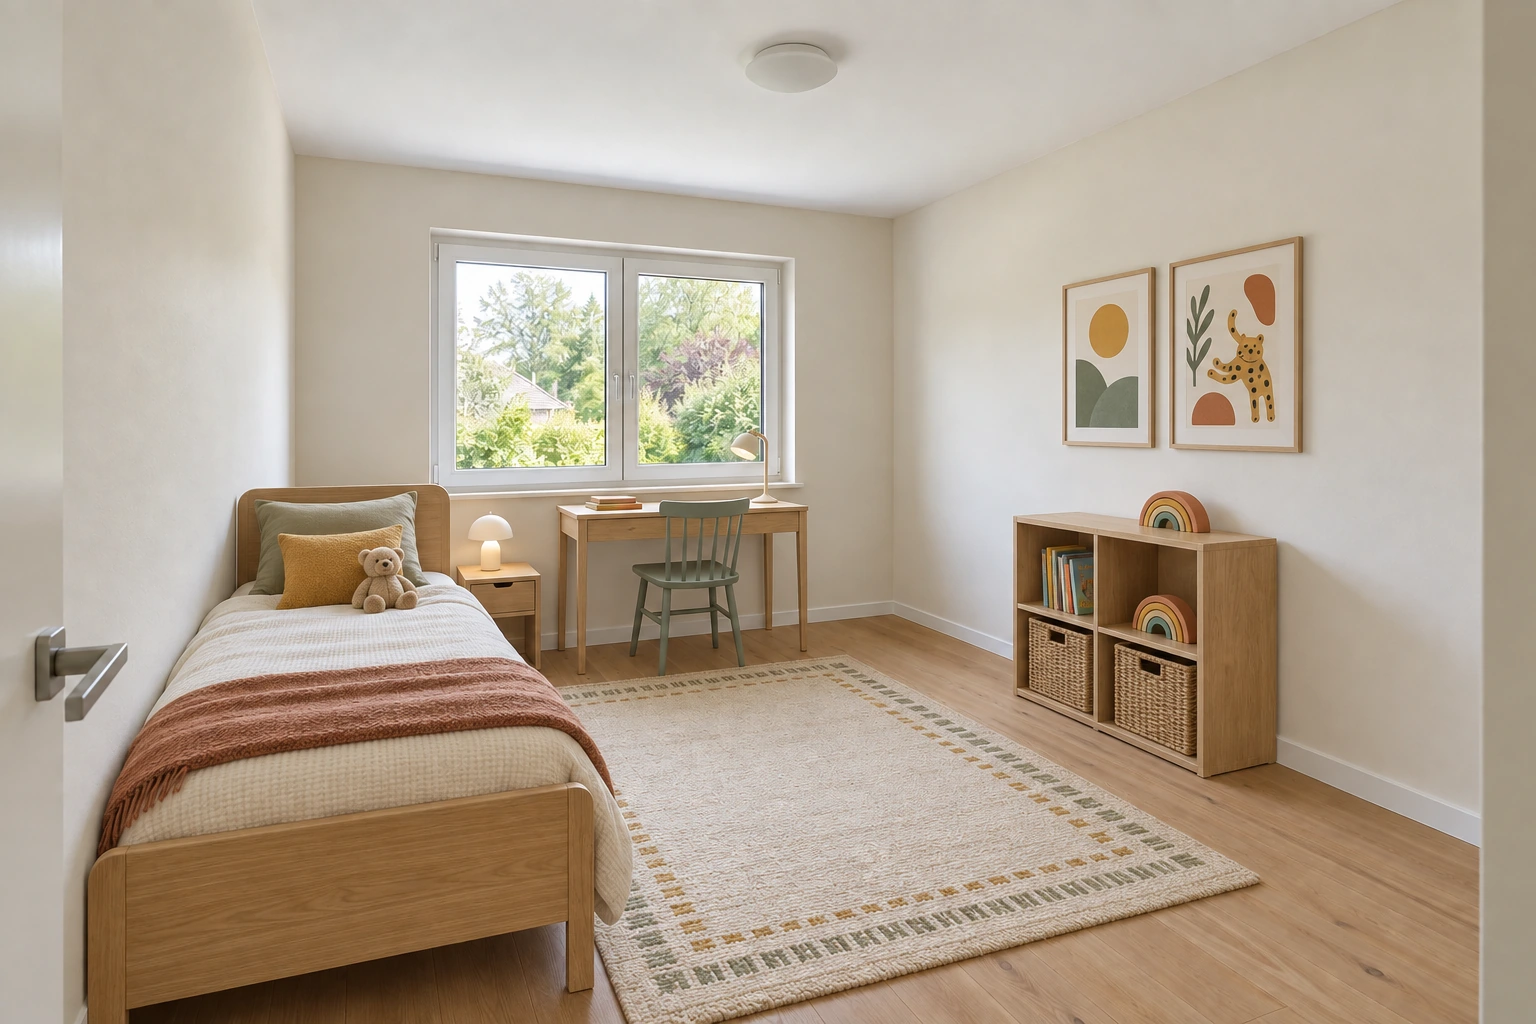
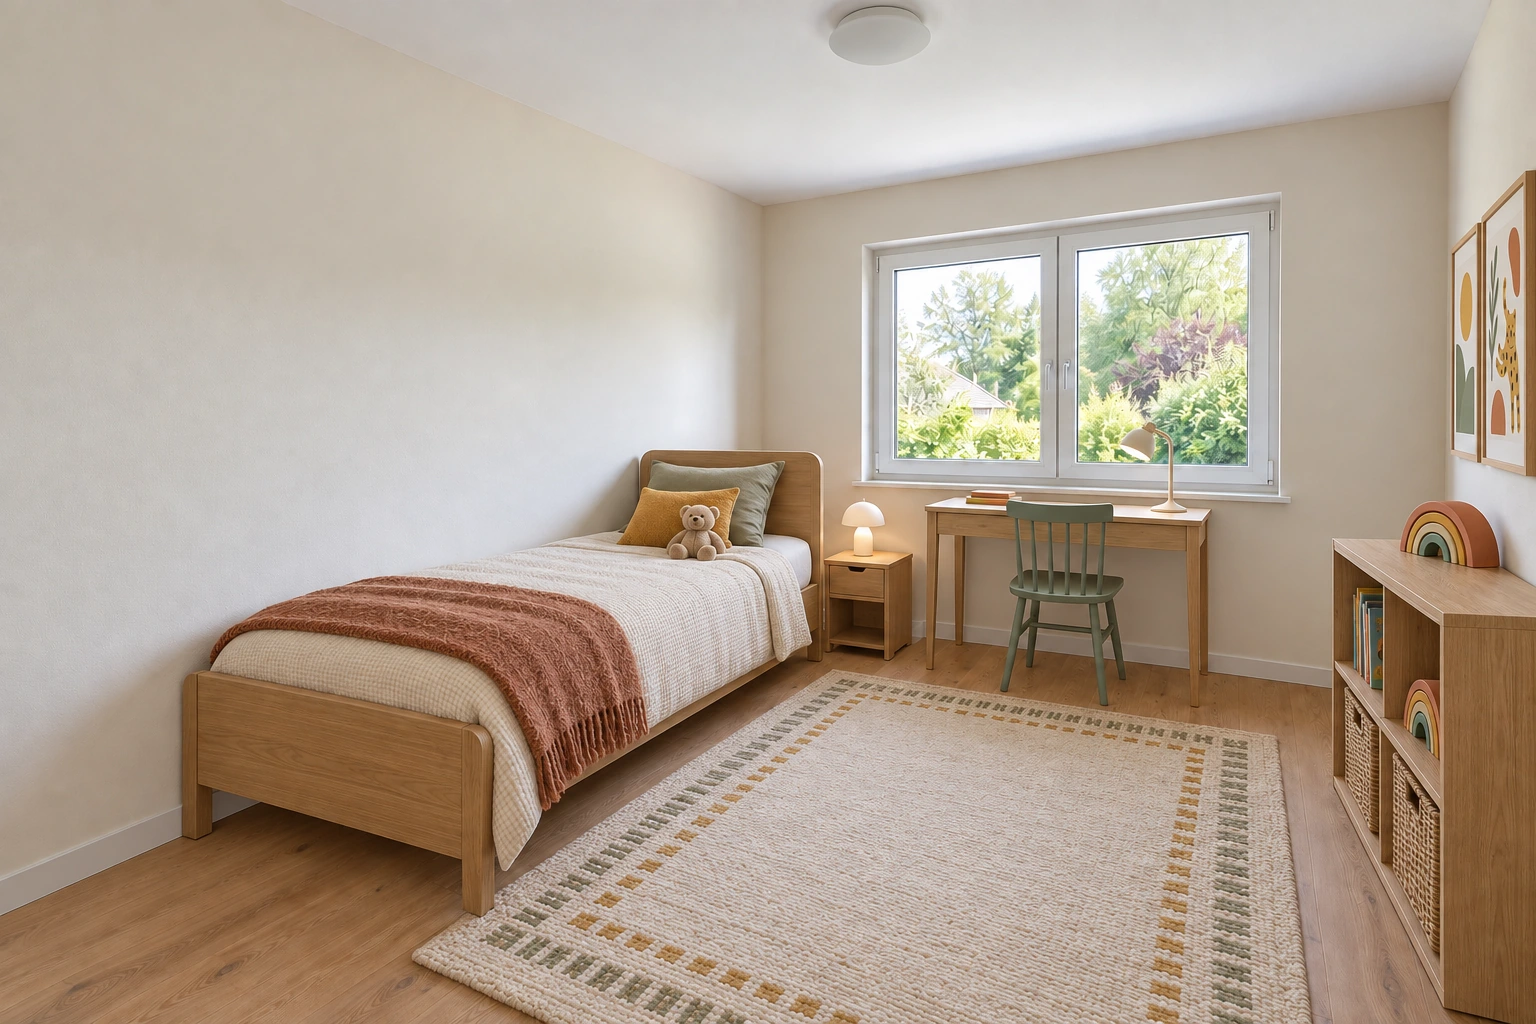
Kids’ room (demo)

ListingAI Precision Pro

AI-generated source photos. The oak bed, sunny desk, sage chair and storage carry into the second view, along with the bedding and rug. Fine textures and smaller details vary.

First view
Kids’ room (demo), first view, staged with ListingAI Precision Pro
The first photo establishes the room’s look.
Matching view
Kids’ room (demo), matching view, staged with ListingAI Precision Pro
The other angle uses that design as a reference.

Two staged views of the same room. Compare with the originals to inspect the changes.

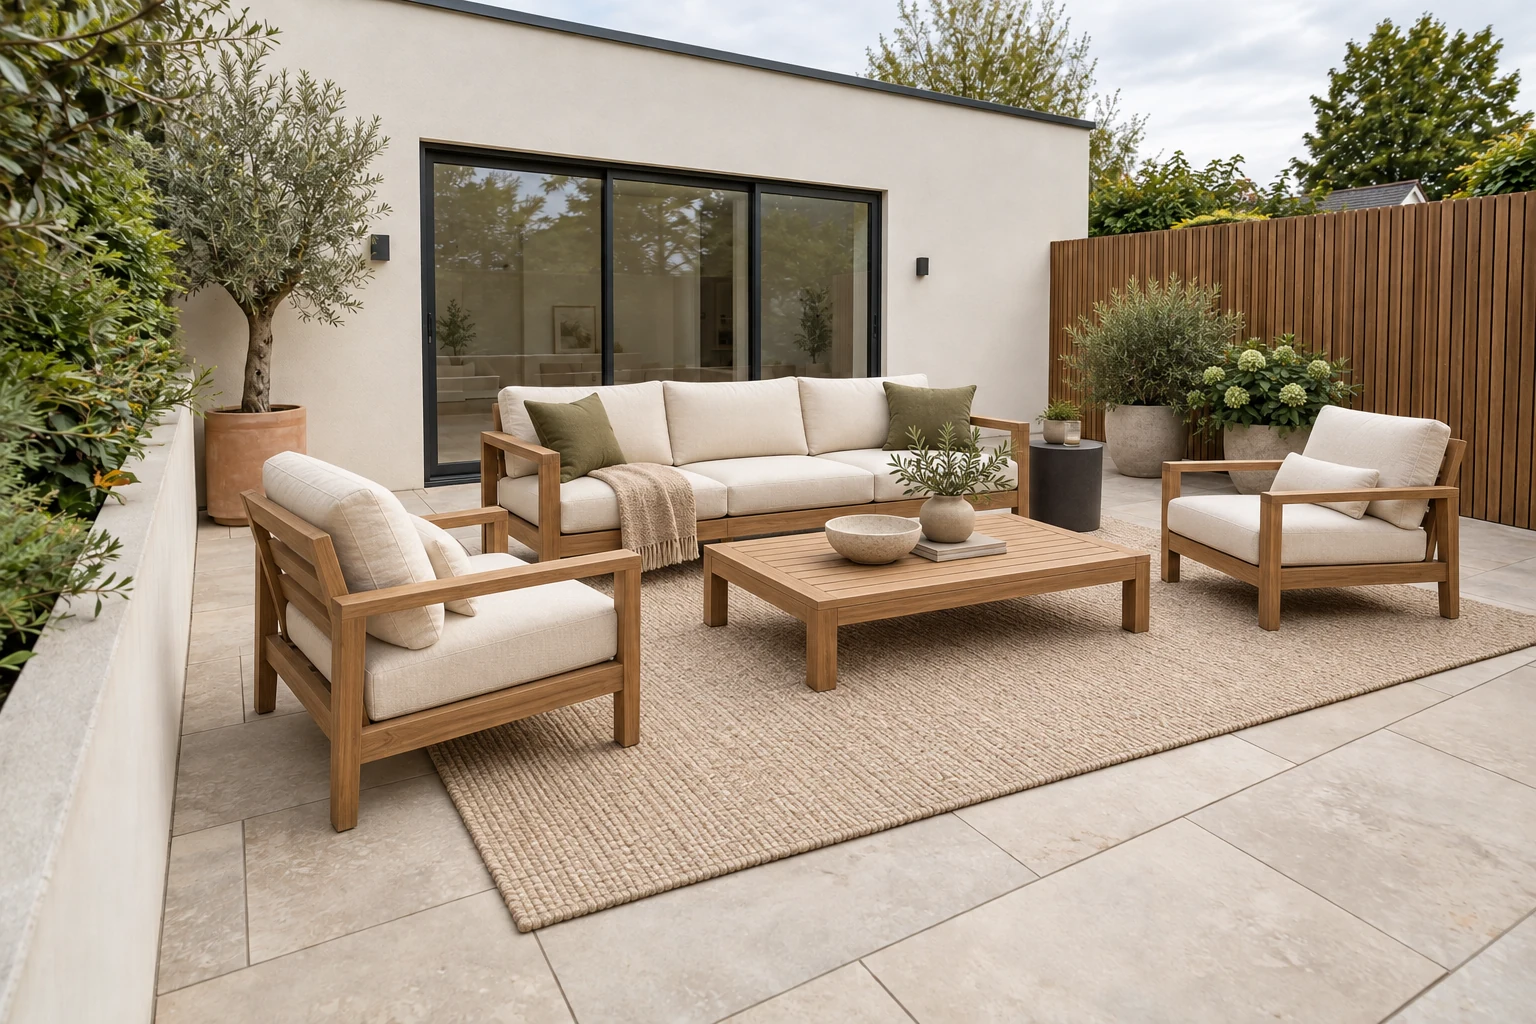
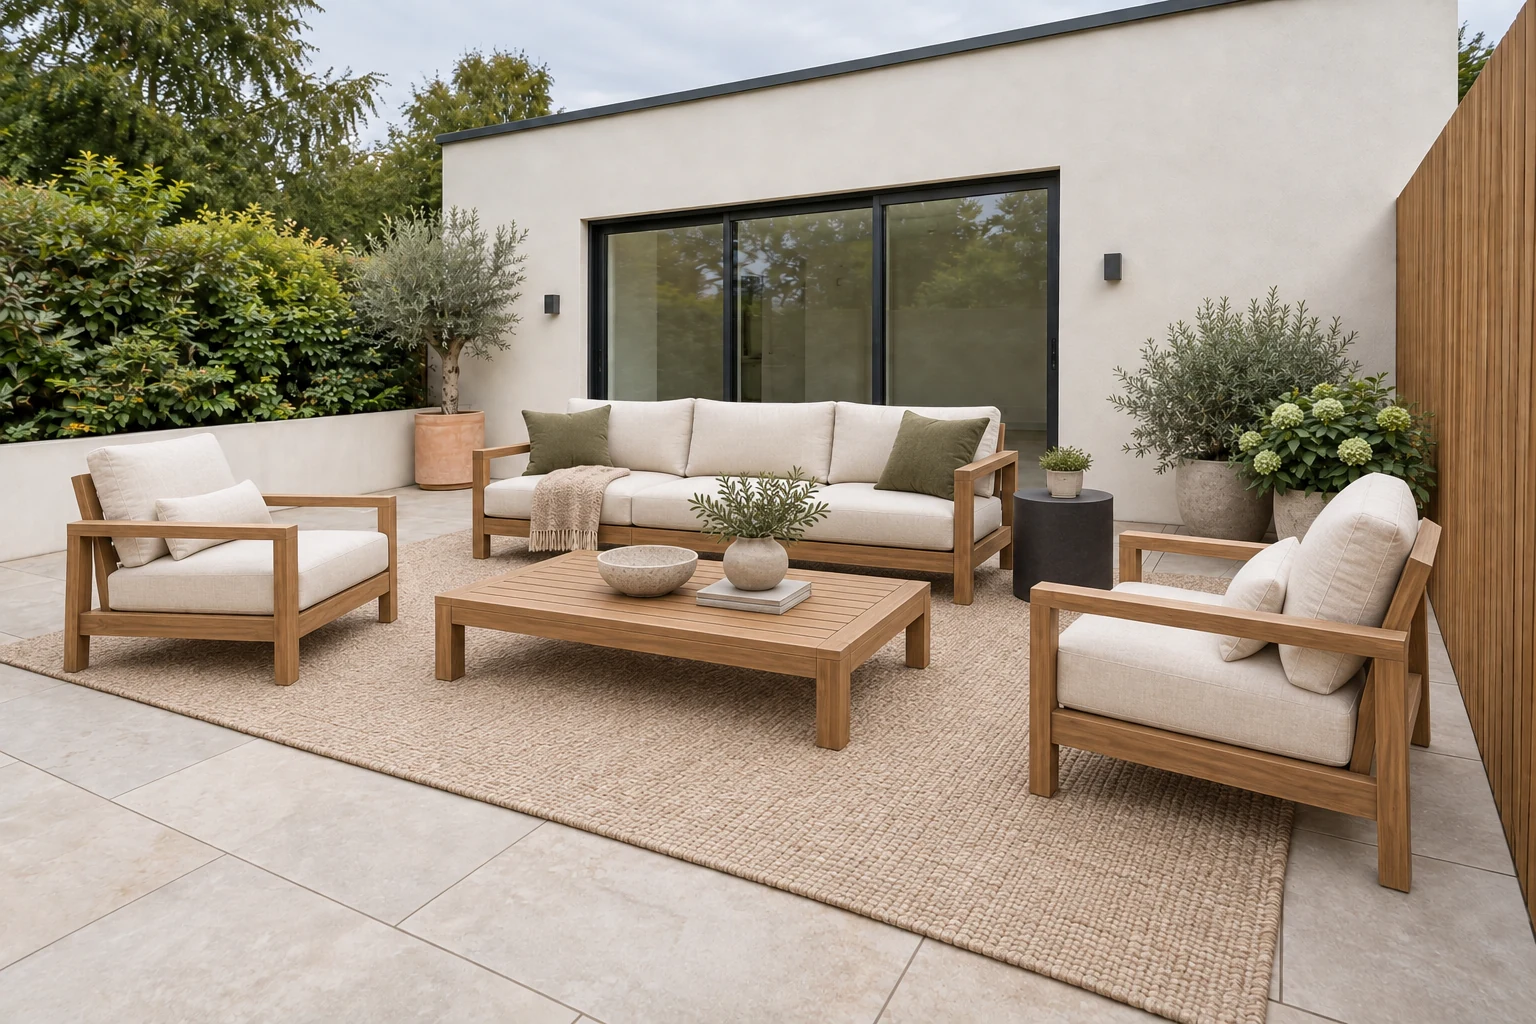
Outdoor living (demo)

ListingAI Precision Pro

AI-generated source photos. The teak sofa, two lounge chairs, rug and tables carry into the second view. Small decor and reflection details vary.

First view
Outdoor living (demo), first view, staged with ListingAI Precision Pro
The first photo establishes the room’s look.
Matching view
Outdoor living (demo), matching view, staged with ListingAI Precision Pro
The other angle uses that design as a reference.

Two staged views of the same room. Compare with the originals to inspect the changes.

YOUR ROOM IS NEXT

Bring your photos.
Try it for yourself.

Professional, Expert or an active 30-day Professional pass.